Deploy Blog on Azure Storage
Using GitHub Action to build Mkdocs and deploy to Azure
Oct 1 2024

0. Intro
Skip my complains to real deployment process
Several days ago, I have this new idea to setup a personal website again after abandoned my website for several years, even forgot to renew my domain. I have few experience with building my own website using Wordpress before, but consider the LAMP stack (Linux, Apache, MySQL, PHP) is a thing from ancient time, learned those back when I was still in middle school (around 10 years ago), and I just don't want to deploy another PHP website in 2024, the world don't need another internet artifact 🦕.
I realized that there is no need to create a dynamic content website at all, because all I wanted is a website with almost zero user interaction, even if I want to add comment function later, that could be easily done by sending an AJAX request to a serverless function run on Cloudflare Worker or Azure Functions which mean there is no need to any dynamic code on the blog site itself, also that means that I do not need to do any maintenance work on a $5 VPS.
On the other hand, I like that Wordpress offer a easy way to just write a blog post, the writing tool provided in Wordpress is easy to use with zero HTML gymnastics, which felt like Microsoft Word, as it should be, but I perosnally use Markdown to write a lot of documents, and Markdown can be easily rendered into HTML. So that is the logical choice for me to write blog post in.
So, summary all that long chat up, I need a blog stack that offer:
- Write everything in Markdown
- Render Markdown content into a static HTML site
- Some form of automation, so I don't need to upload a zip everytime I write something
- A service that serve a static website
- Maybe a CDN service that can cache the static content being served
The tool I choose to use to render Markdown into static website files is MkDocs, it is quite popular and being used to host a lot of documentations of opensource projects, but there is not a lot of difference between documentation and blog 🤣.
I have been using Cloudflare Pages to serve NextJS projects, and it also provide GitHub integration which provided all the necessary automation function, and there is a step by step guide provided by Cloudflare. When this website first came online several days ago, this was my choice, and the guide is very easy to follow, with good GitHub integration, but this method come with downside too.
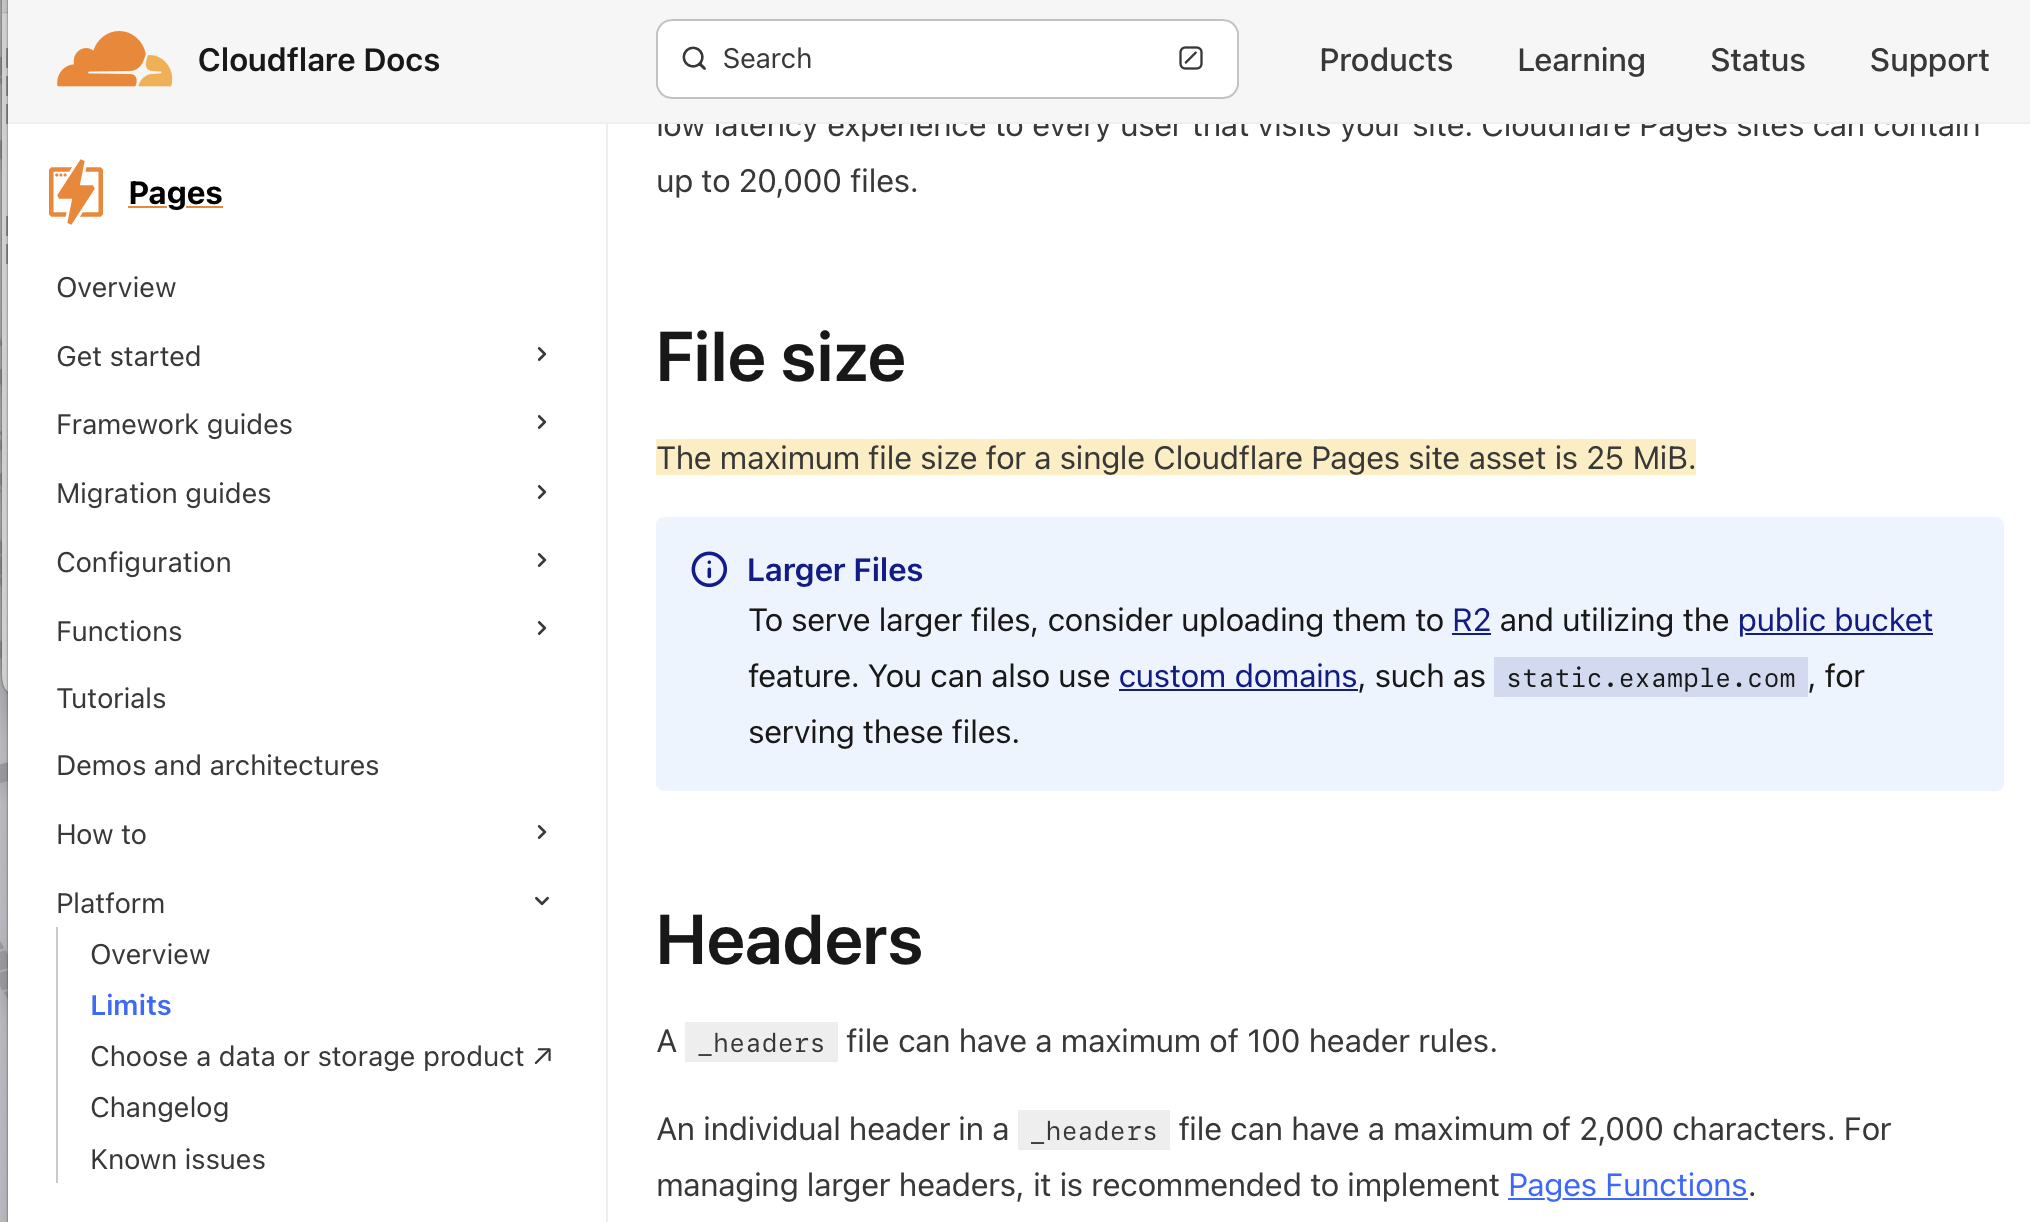
One of the biggest limitation is the max file size in Cloudflare Pages is 25MB.
The other thing is I do not want to be locked into one cloud provider's ecosystem.
 My Cloudflare account seems to have some issue with billing, it's certainly my fault, I didn't pay the bill first, but this left a bad taste in my mouth, so I am planing to move away from the Cloudflare ecosystem and migrate to Microsoft Azure, why Azure? I don't want to use AWS and pay for Jeff Bezos' yacht 🛥️.
1. Setup GitHub Repo
Enough of complaining, time to deploy the website. Following the Guide provided by Cloudflare, we already have a GitHub with these files.

If you did not setup a Cloudflare Pages site first you could follow these steps.
(Copied From Cloudflare Documents)
1. Install MkDocs:
pip install mkdocs
2. Create an MkDocs project:
Use the mkdocs new command to create a new application:
mkdocs new <PROJECT_NAME>
Then cd into your project, take MkDocs and its dependencies and put them into a requirements.txt file:
pip freeze > requirements.txt
3. Create a GitHub repository:
Create a new GitHub repository. After creating a new repository, go to your newly created project directory to prepare and push your local application to GitHub by running the following commands in your terminal:
git init
git remote add origin https://github.com/<your-gh-username>/<repository-name>
git add .
git commit -m "Initial commit"
git branch -M main
git push -u origin main
2. Setup Azure Storage Account
Next step is to set up the Azure Storage Account which is going to host the static site. Here I assume you already have a Azure account available for use.
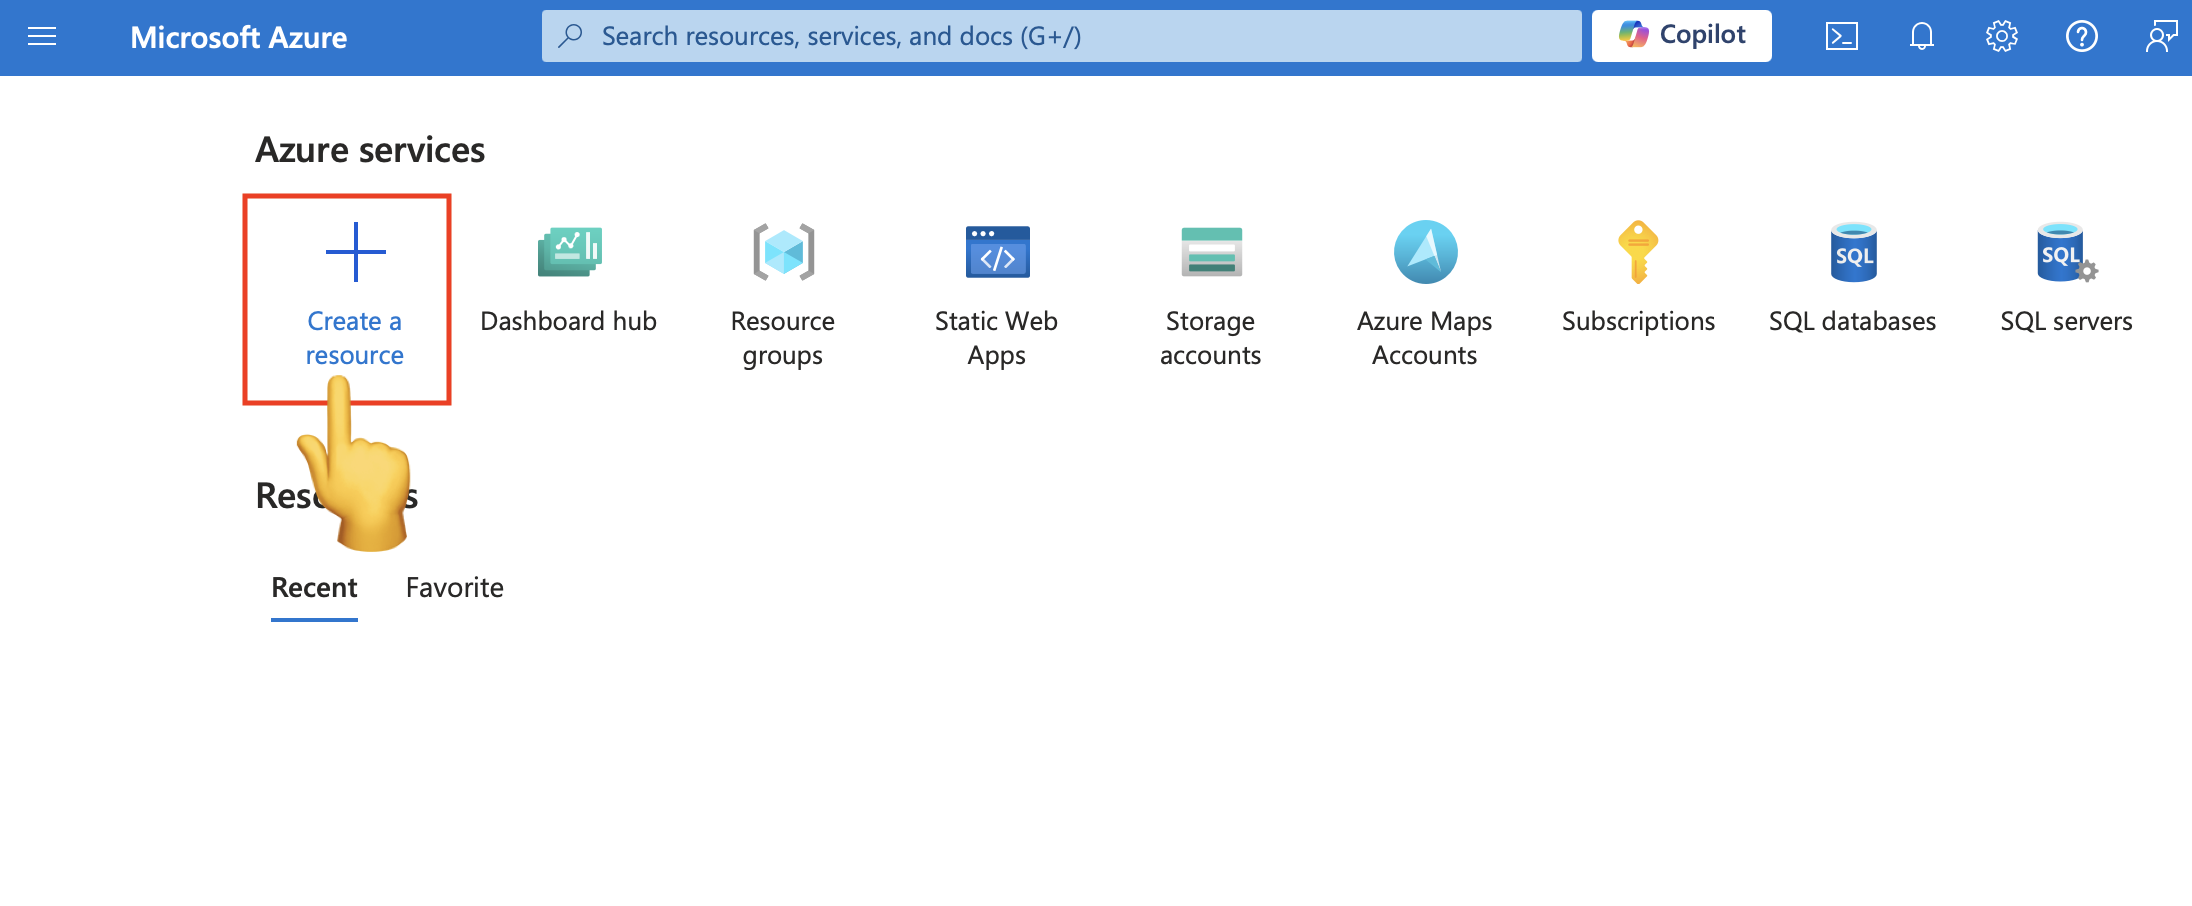
1. Create a Storage Account in Azure Portal
Click here to set up a Storage Account. The name of the account could be anything.
After the resource have been deployed you should be able to view the informations about this Storage Account.
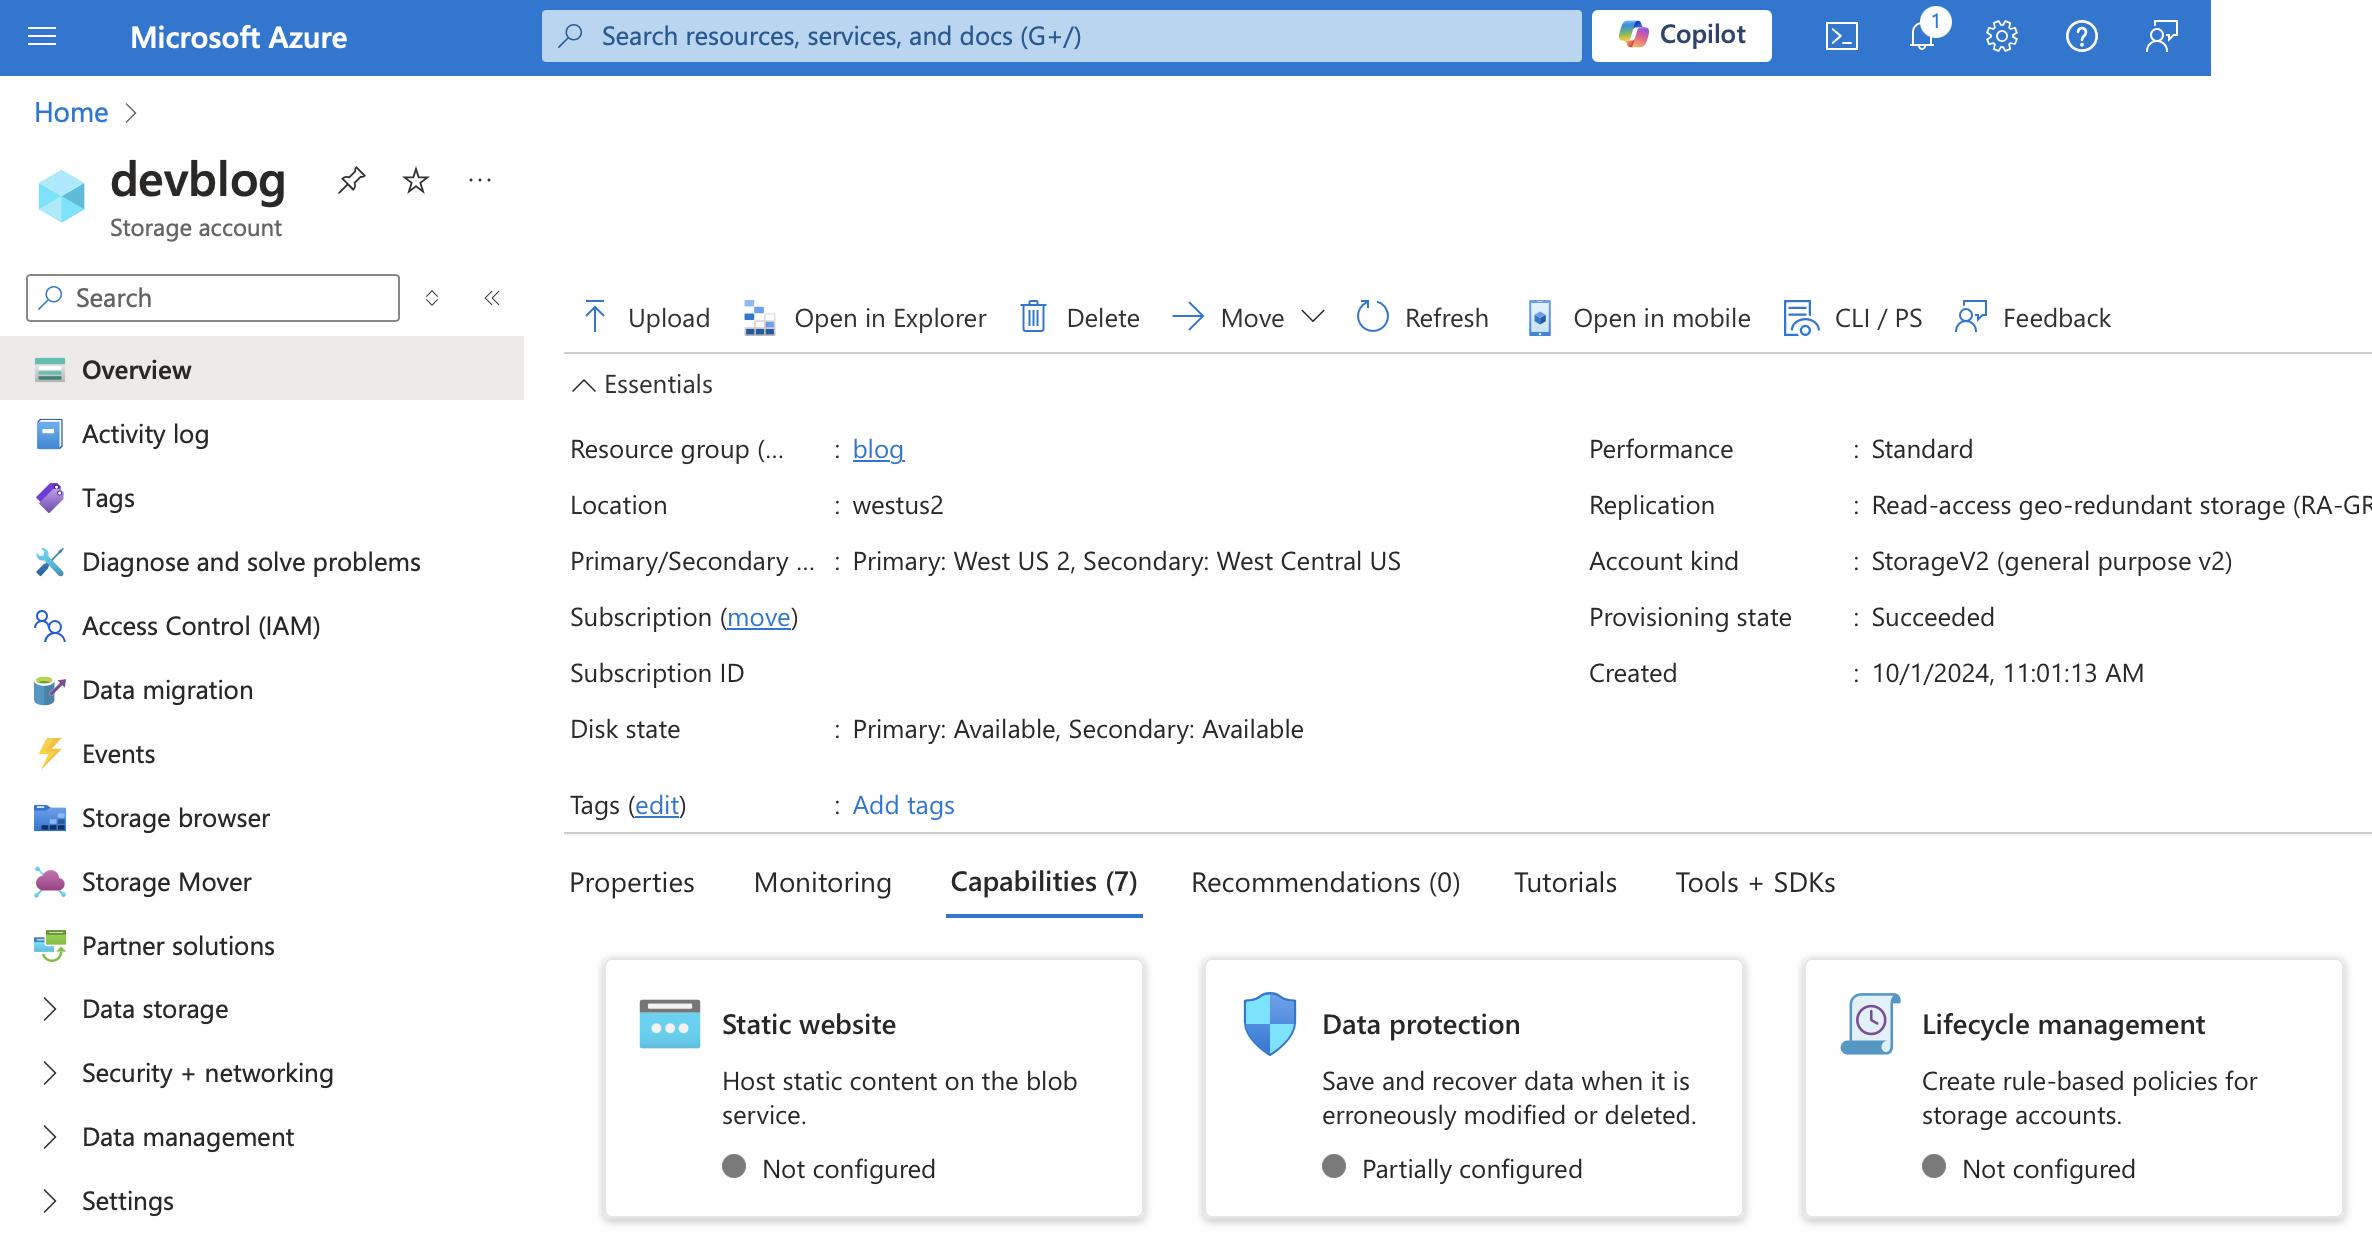
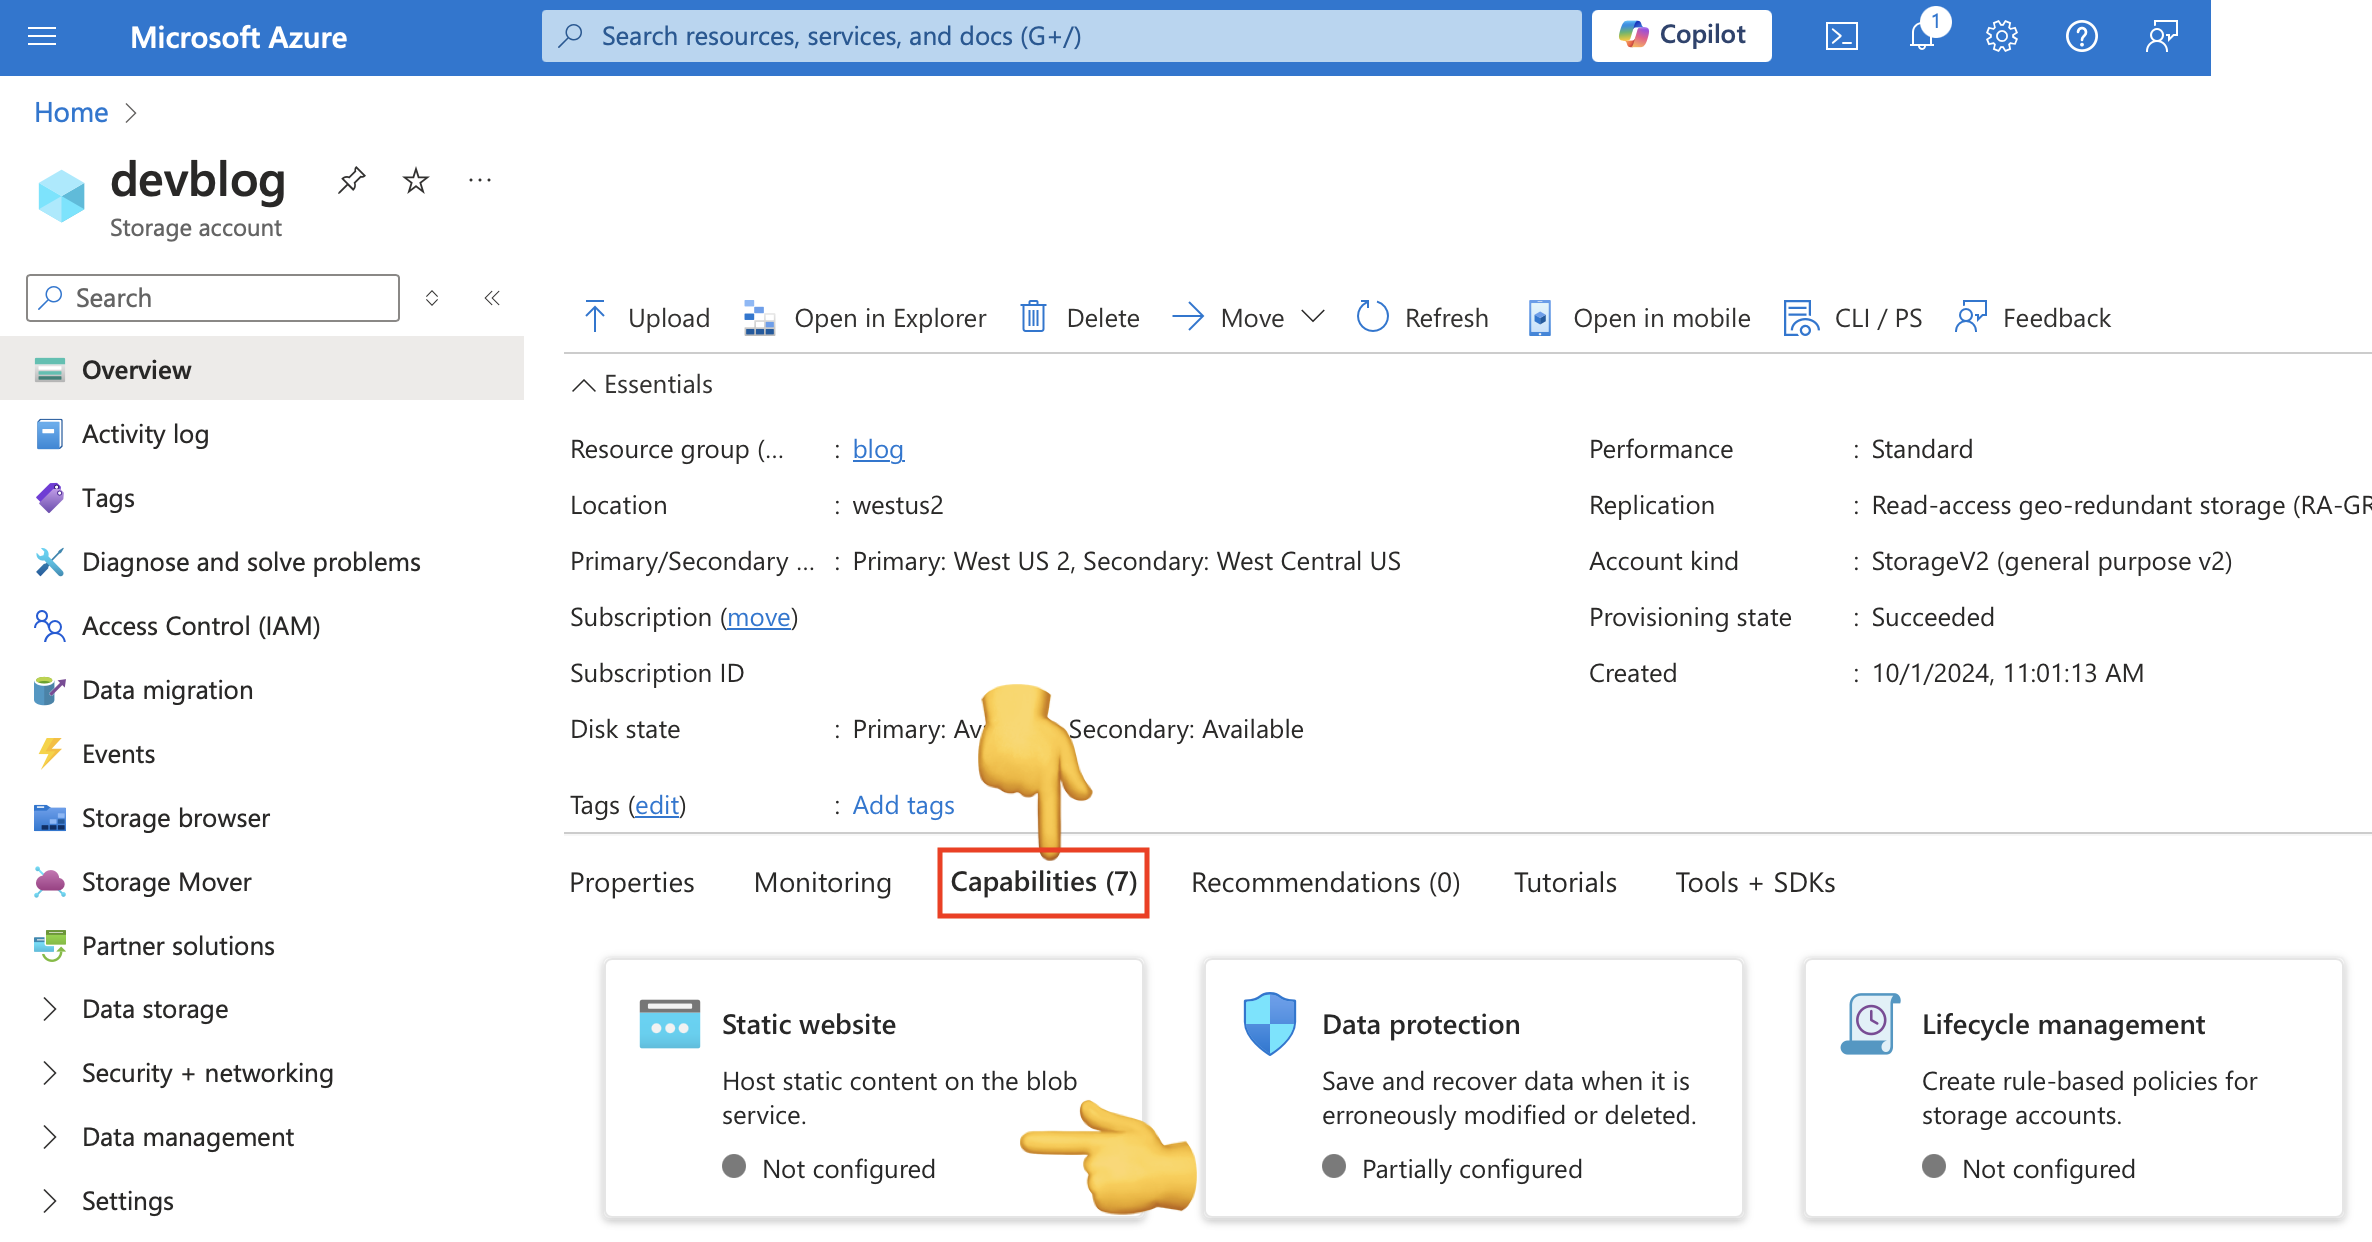
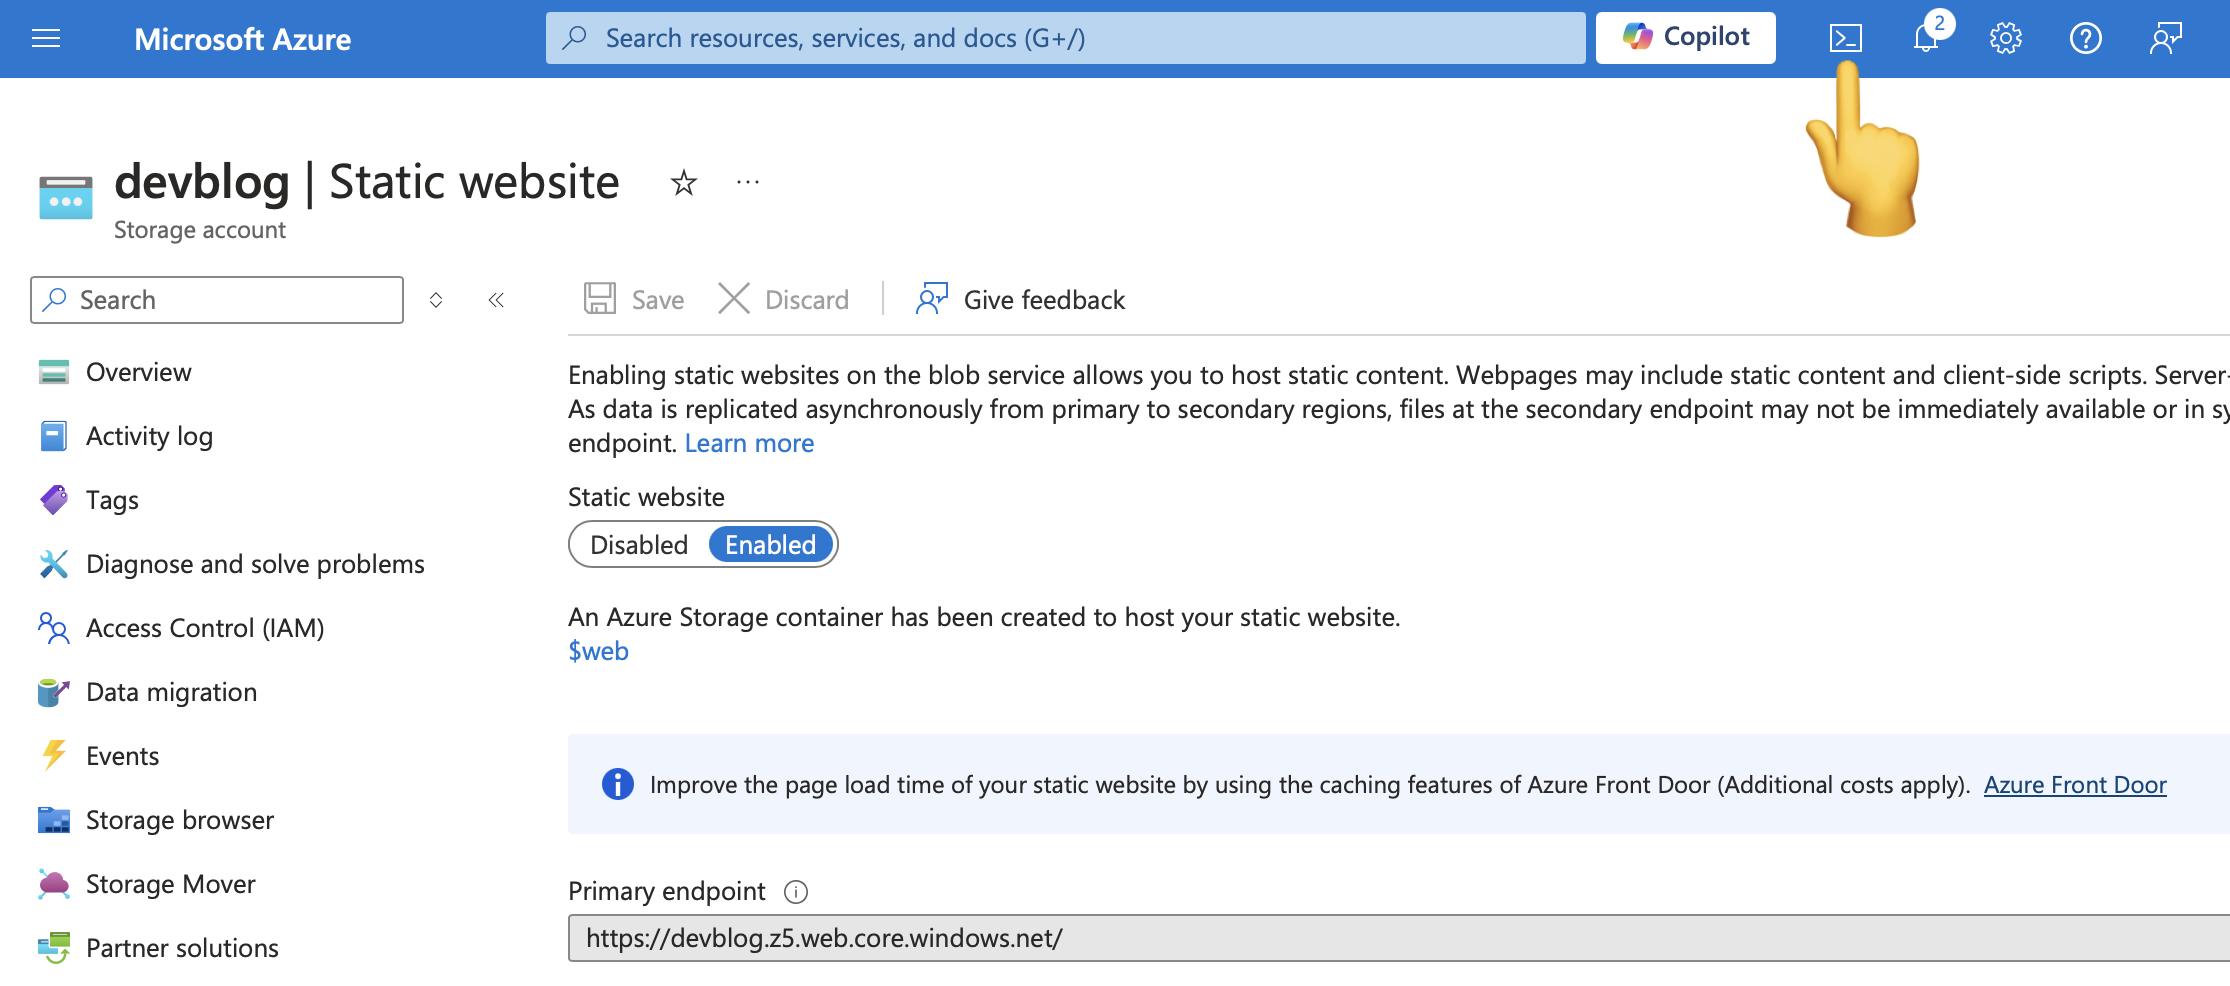
2. Enable Static Website Capability
Click on the Capabilities tab and select static website.
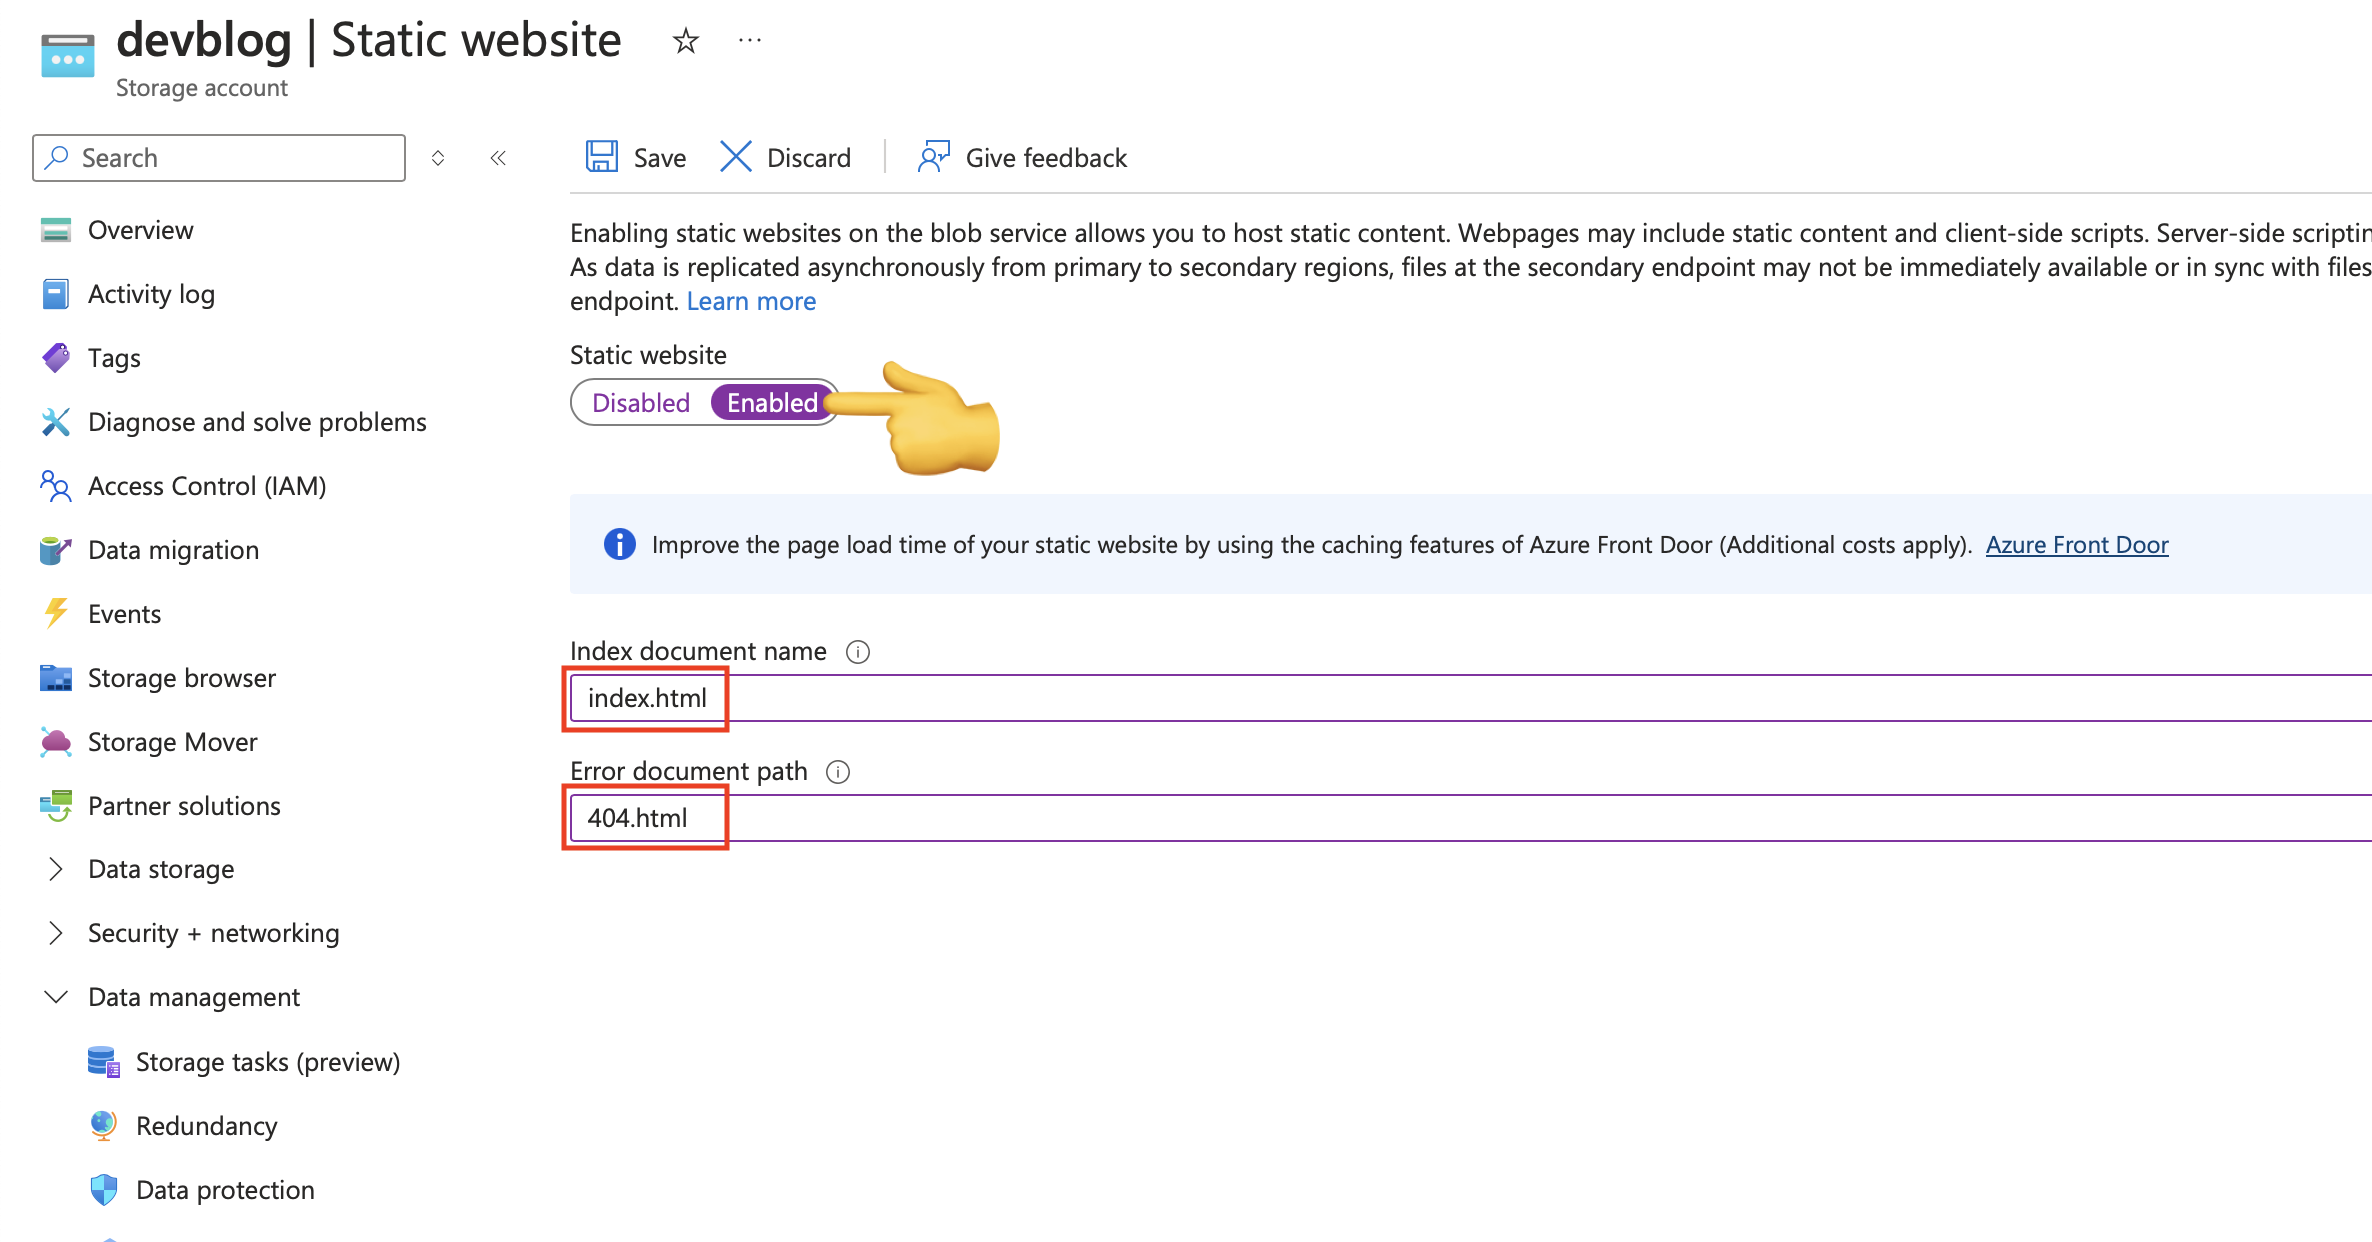
Enable the Static Website Toggle and fill in the document path:
- Index document name
index.html - Error document path
404.html
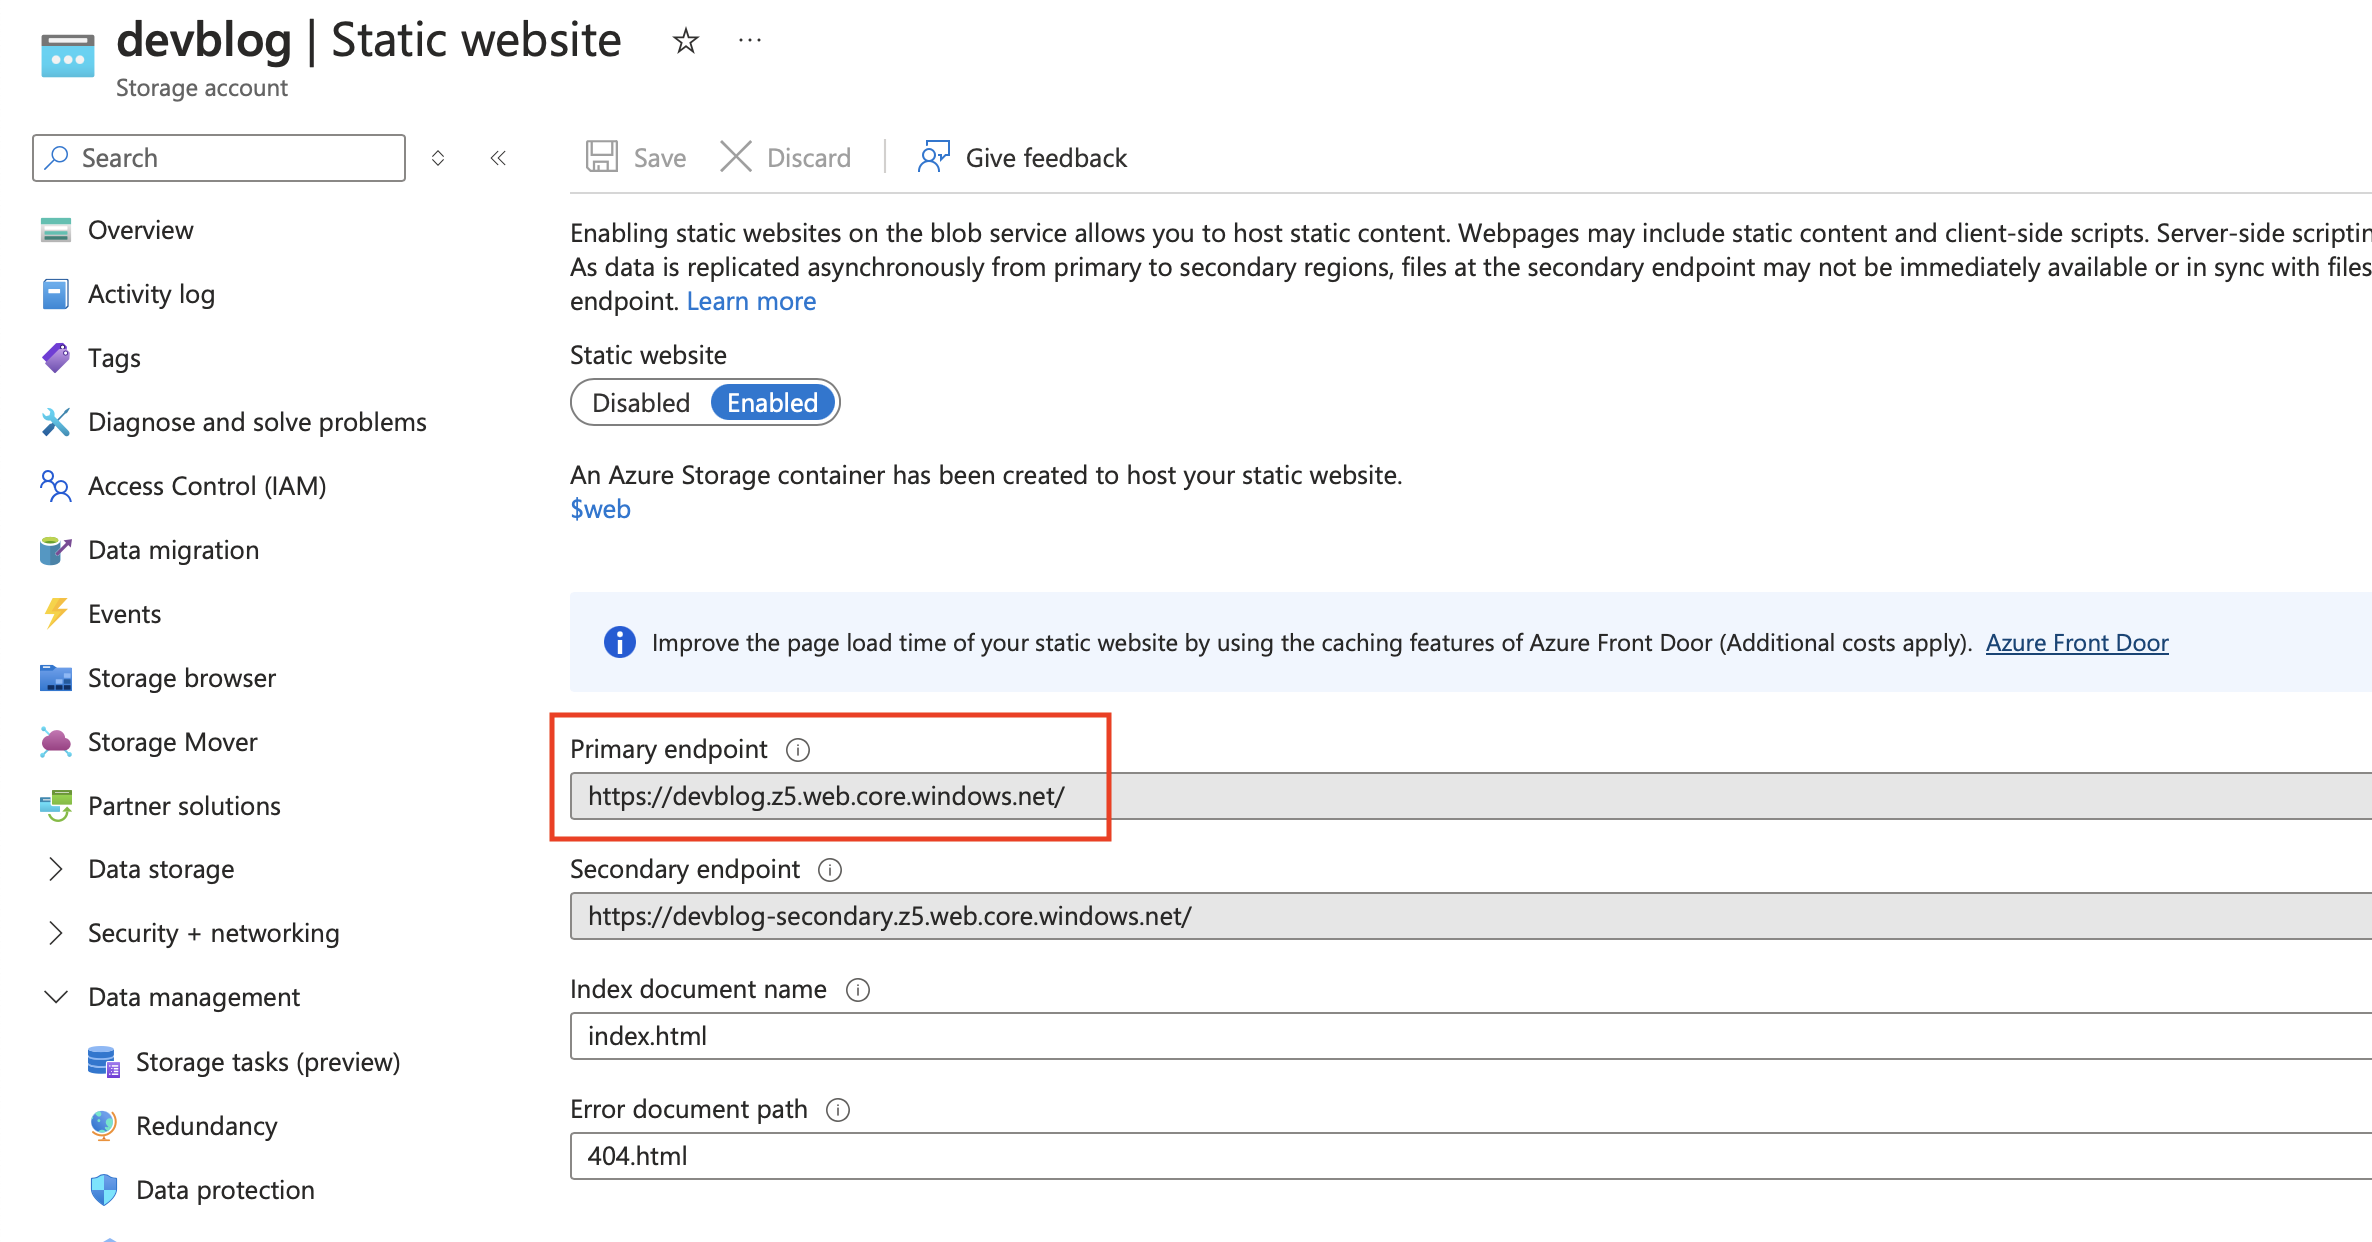
After that click save, and you should be able to see the Endpoint created for your static website.
And copy the Primary endpoint into a browser, you should be greeted by a The requested content does not exist. error.
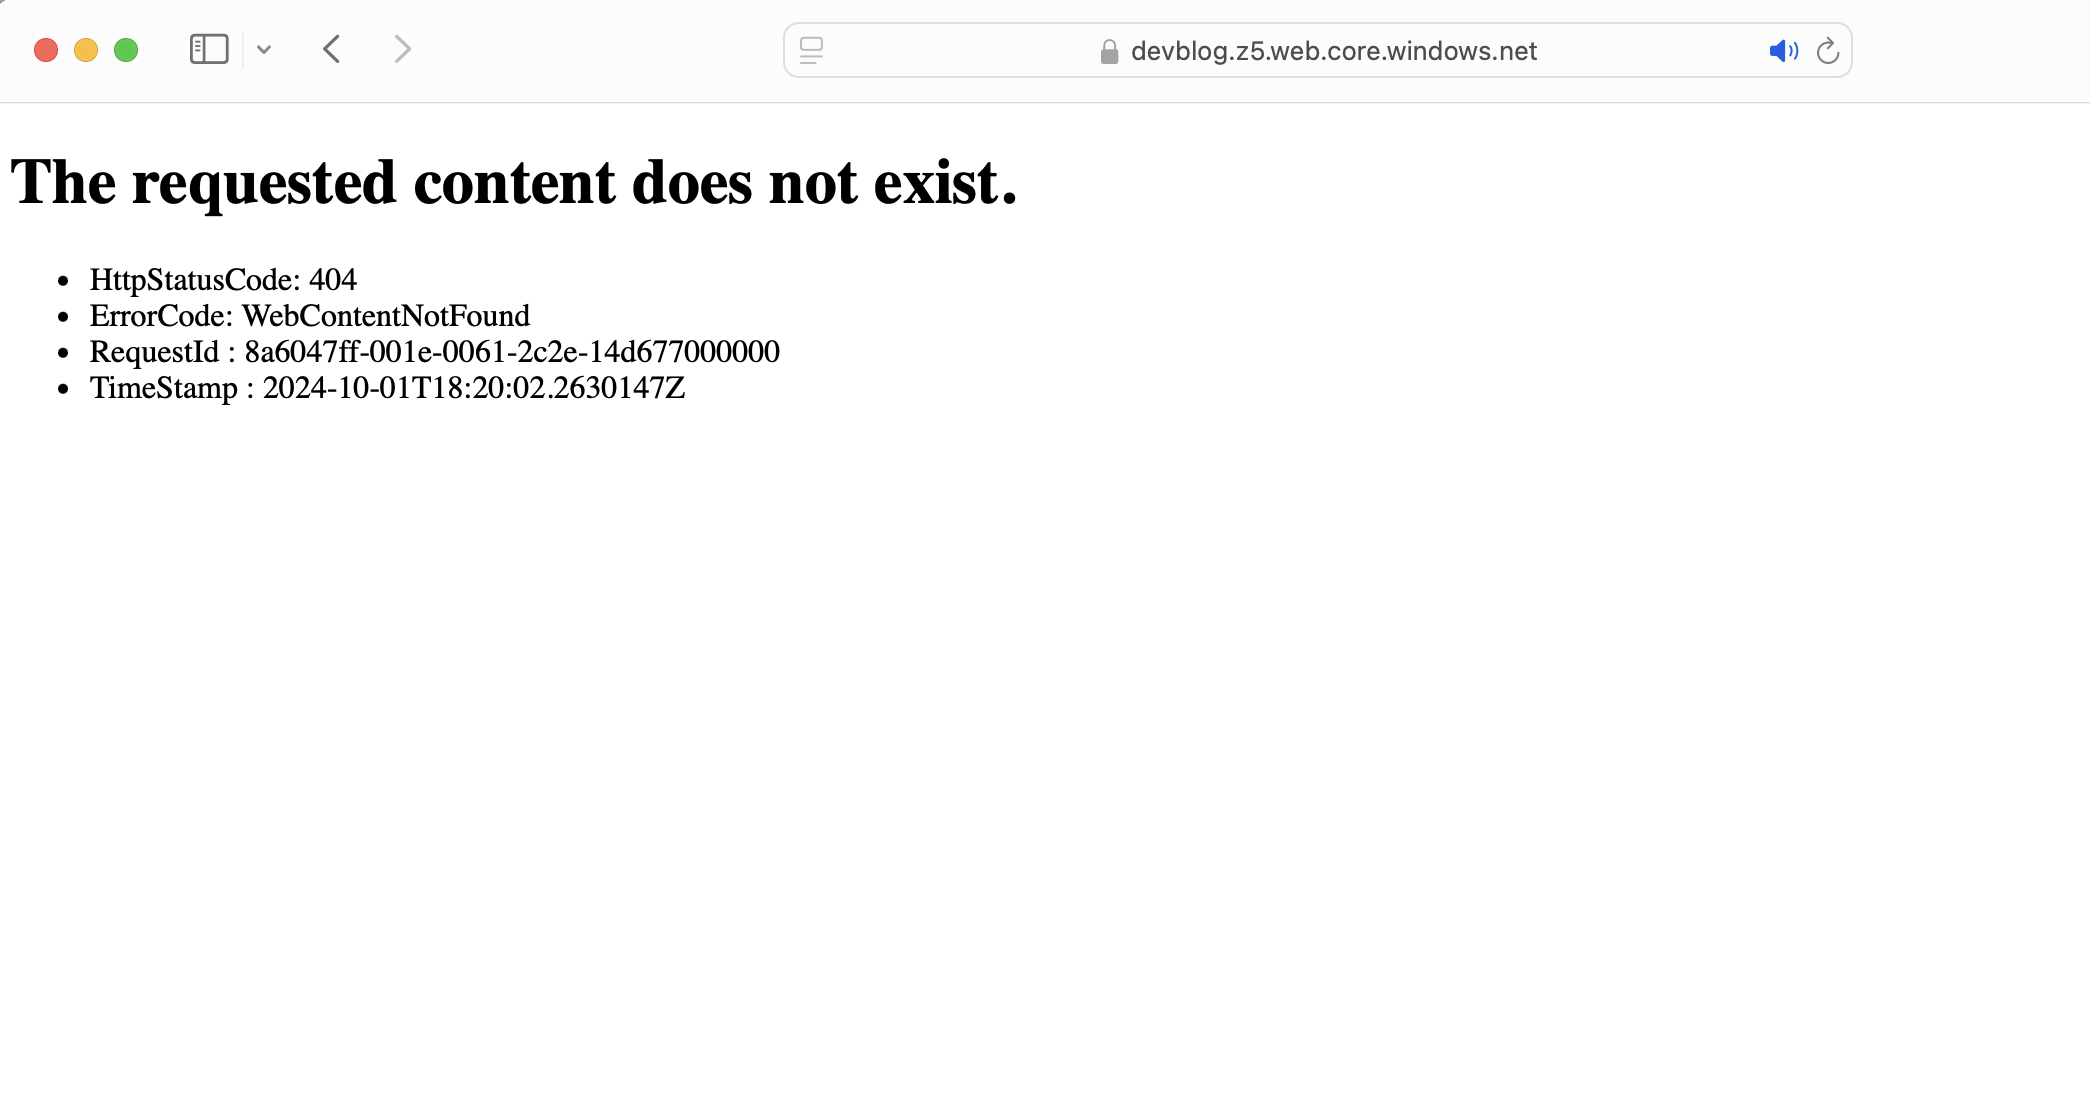 This is because we have just configured Storage account send 404.html to user when the request page cannot be found, however we haven't upload any files into the
 $web Azure Storage container, naturally there is no 404.html in the container, so we get a Azure Error page. All good, we can keep going.
3. Setup Azure deployment credentials
Next step we want is let GitHub Action to upload Generated static files to Azure automatically whenever there is a push in the main branch in our GitHub Repo. But we need to authorize GitHub Action to access our Azure Storage Account, so we need to setup a Azure Credential for GitHub Action.
1. Generate Azure credentials in Azure Cloud Shell
We can open Azure Cloud Shell in Azure Portal by click the console button on the top right.
 There should be a shell windows pop up at the bottom half of the screen.
Select PowerShell for shell program. This time we don't need to attach a storage account, because we are not going to save any data in the Cloud Shell. After apply the setting we should be able to run Azure Cli commands in the Cloud Shell.

We can generate Credential by typing in the PowerShell command.
az ad sp create-for-rbac --name "GithubAction" --role contributor --scopes /subscriptions/<subscription-id>/resourceGroups/<group-name> --json-auth
Replace the Subscription-ID and ResourceGroup-Name with your own, which can be retrieved from the Storage account Overview tab.
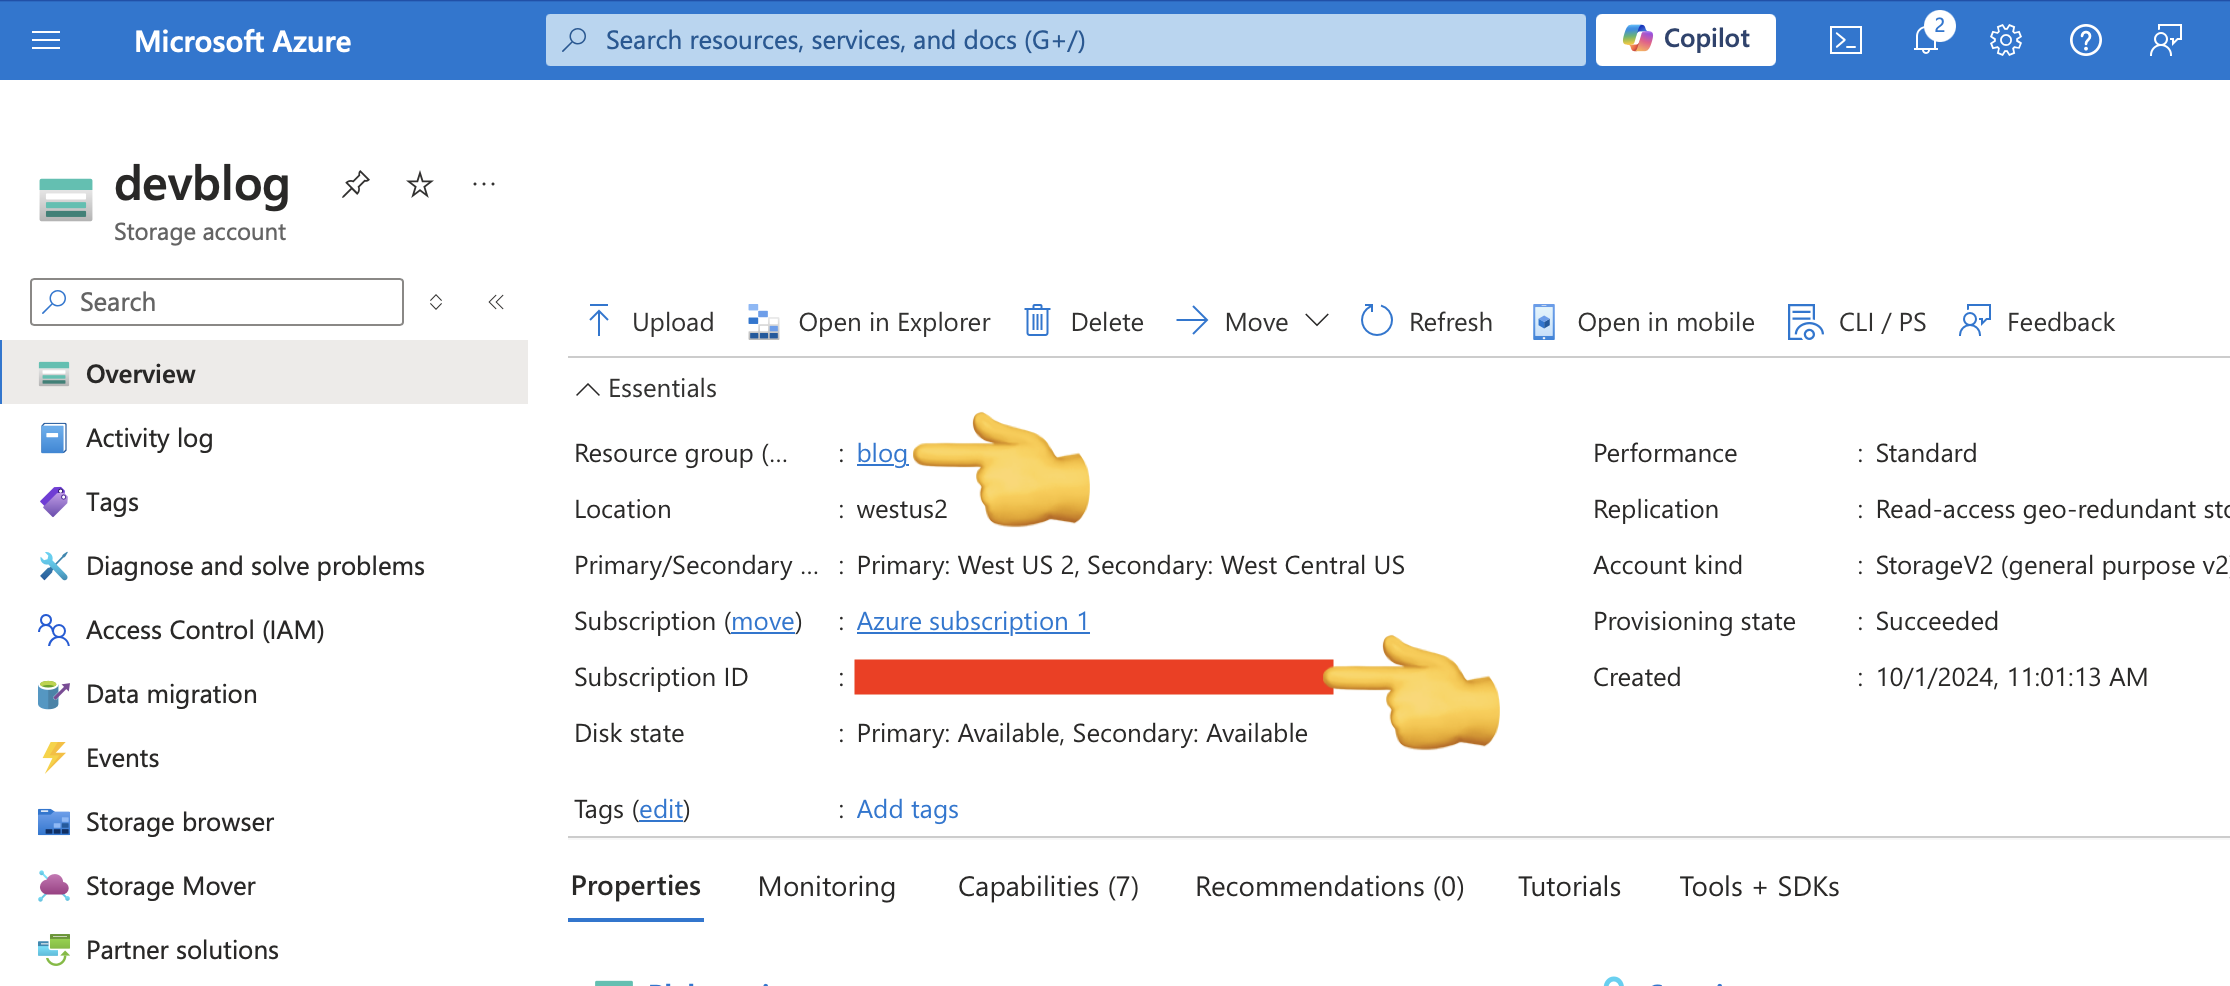
This command should give you back a JSON credential, keep it safe!
{
    "clientId": "<GUID>",
    "clientSecret": "<GUID>",
    "subscriptionId": "<GUID>",
    "tenantId": "<GUID>",
    (...)
}
2. Save Azure credentials in GitHub Action secrets
Go to the GitHub Repo, in settings tab, select secrets and variables on the left side, create a new Repository secrets.
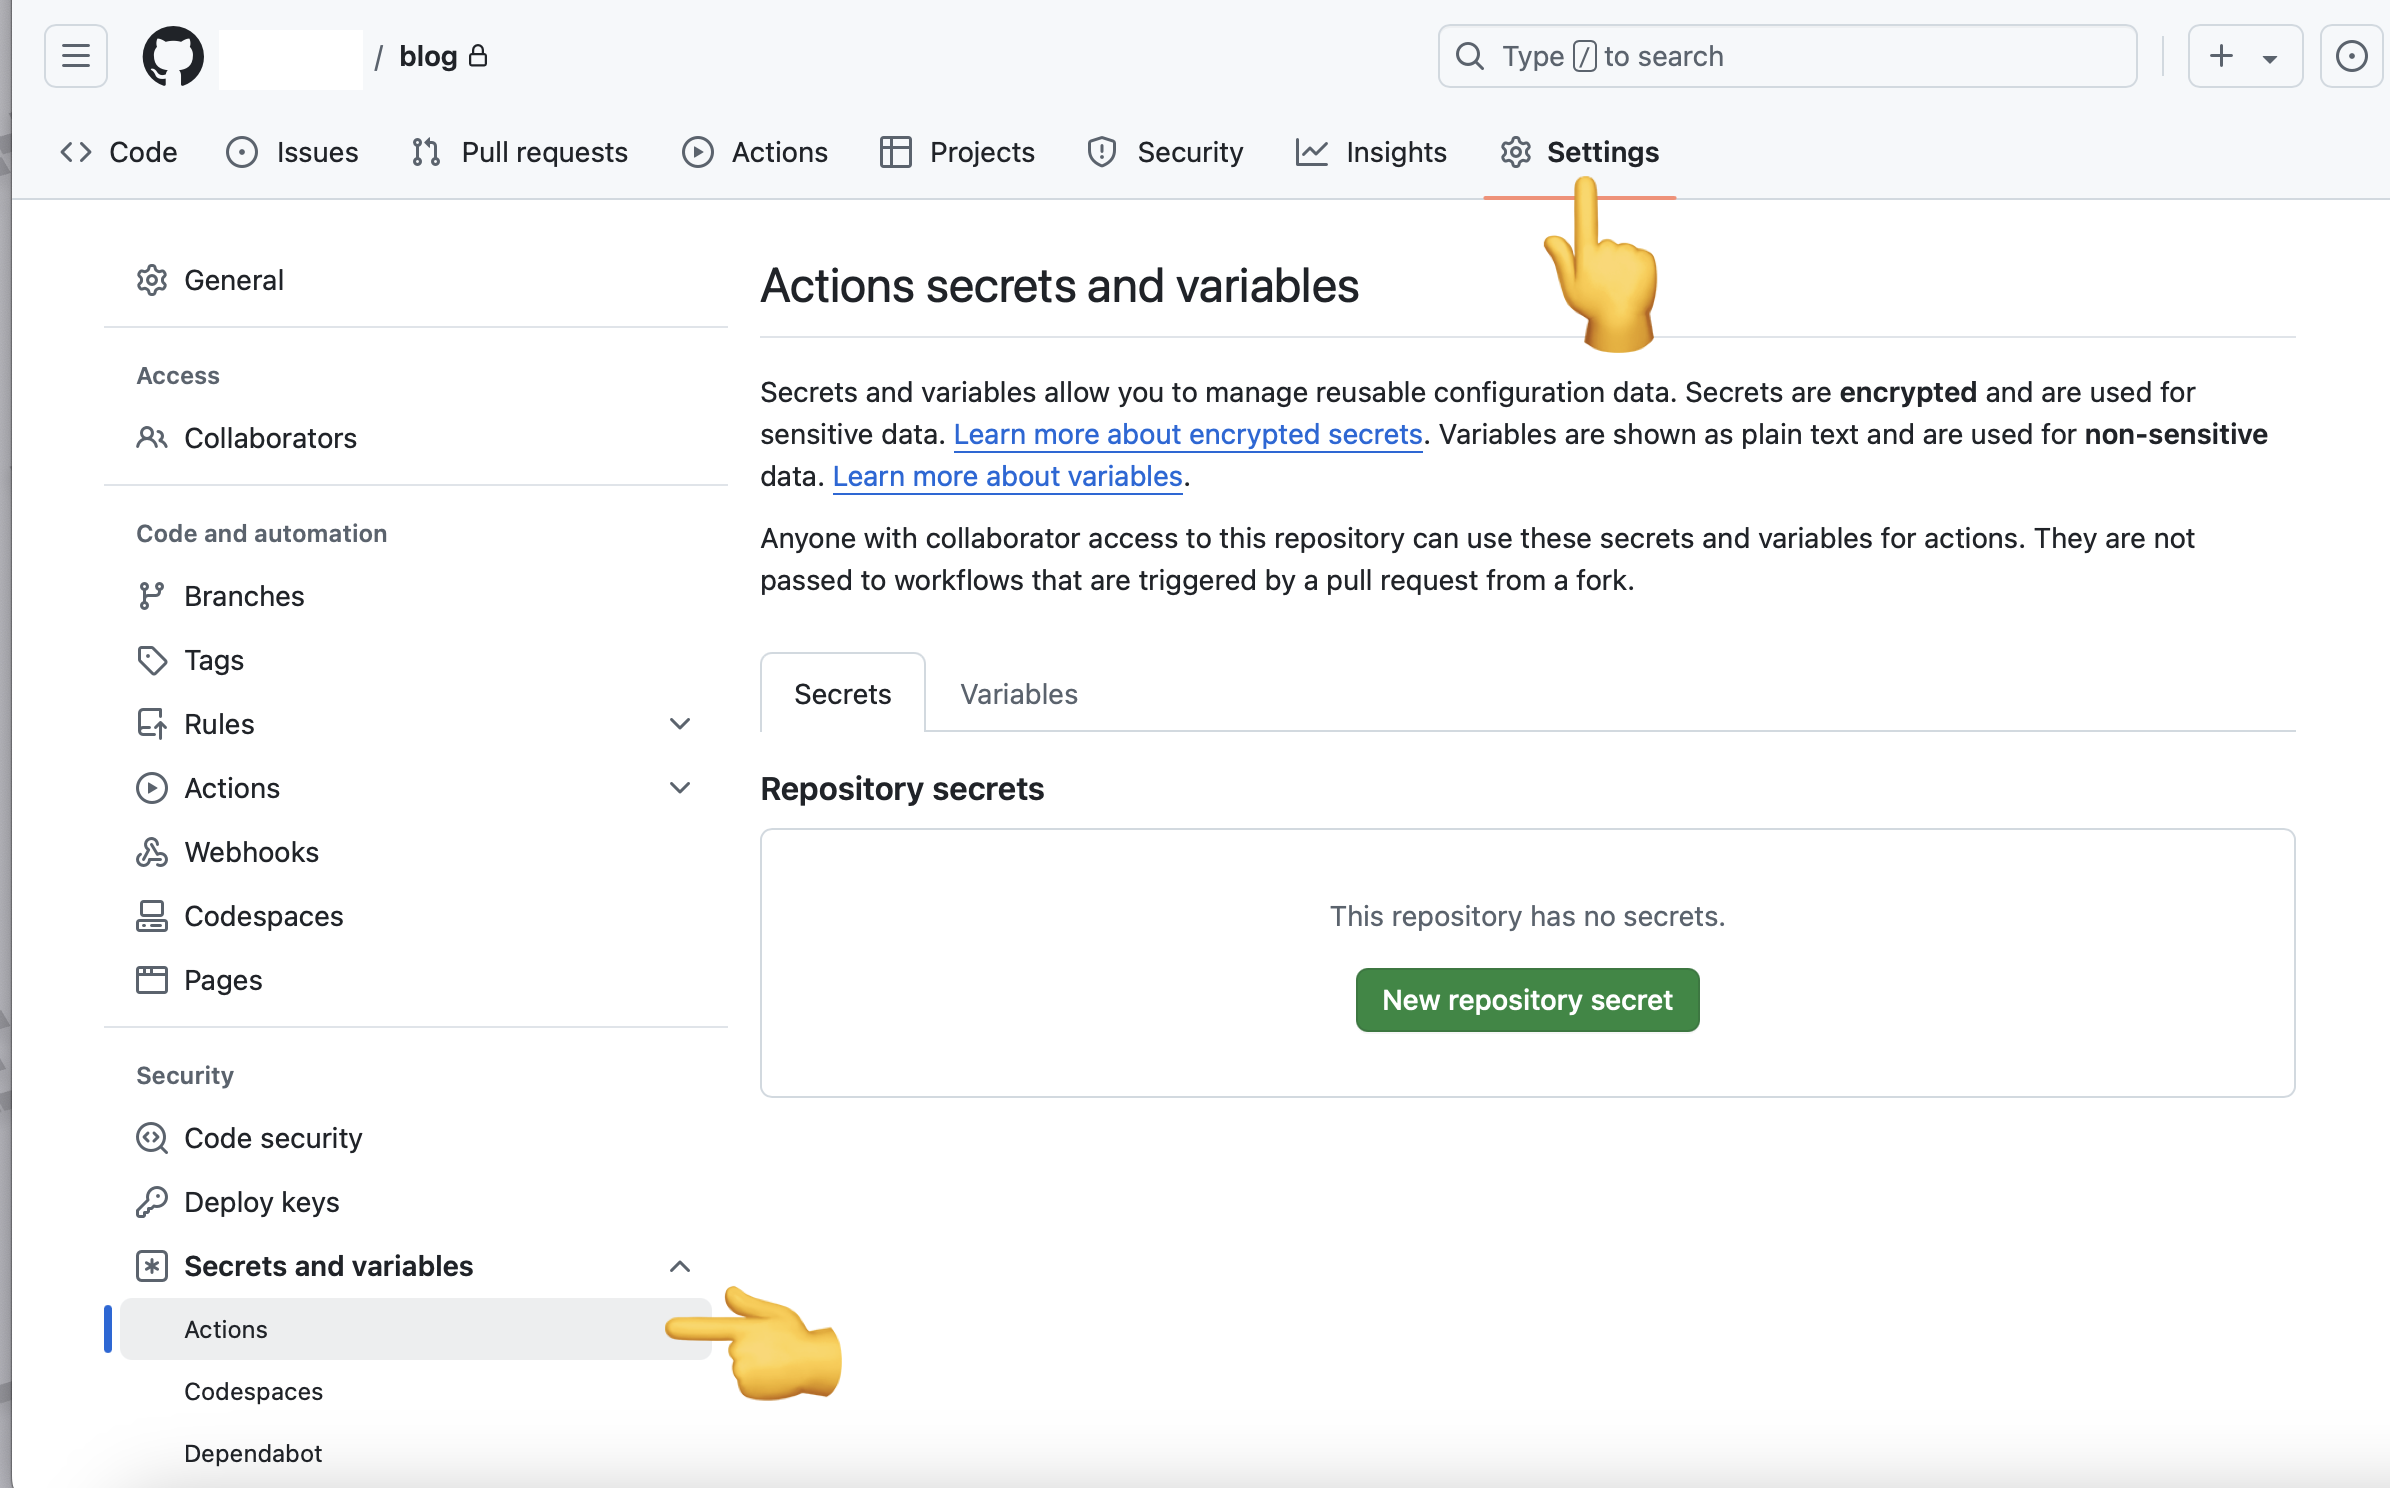
Save the JSON credential create before into GitHub Repo.
Name: AZURE_CREDENTIALS
Secert:
{
    "clientId": "<GUID>",
    "clientSecret": "<GUID>",
    "subscriptionId": "<GUID>",
    "tenantId": "<GUID>",
    (...)
}
4. Create a GitHub Action File in your Project
Create a file in the your Project Folder.
.github/workflows/azure-publish.yml
name: Azure Preview Prod
on:
  push:
    # This Action will run when there is a push to main branch
    branches: [ "main" ]
  workflow_dispatch:
jobs:
  build:
    runs-on: ubuntu-latest
    steps:
      # checkout the project repo
      - uses: actions/checkout@v4
      # use python 3.12
      - uses: actions/setup-python@v5
        with:
          python-version: '3.12'
          cache: 'pip' # caching pip dependencies
      # Install Pip Requirements
      - run: pip install -r requirements.txt
      # MkDocs Build markdown into static files
      - run: mkdocs build --site-dir ./site -v
      # Login using Azure Credentials
      - uses: Azure/[email protected]
        with:
          creds: ${{ secrets.AZURE_CREDENTIALS }}
      # Upload Builded file to Azure Storage Account
      - name: Upload to blob storage
        uses: Azure/[email protected]
        with:
          inlineScript: |
            az storage blob delete-batch --account-name <storage-account-name> -s '$web' --pattern "*"
            az storage blob upload-batch --account-name <storage-account-name> -d '$web' -s ./site
This file defined a GitHub Action workflow which will trigger automatically whenever there is update pushed to the main branch.
5. Final Step: Push your changes to GitHub
Once your push the changes to GitHub Repo, the action we defined in the file above should be automatically be triggered and start the workflow.
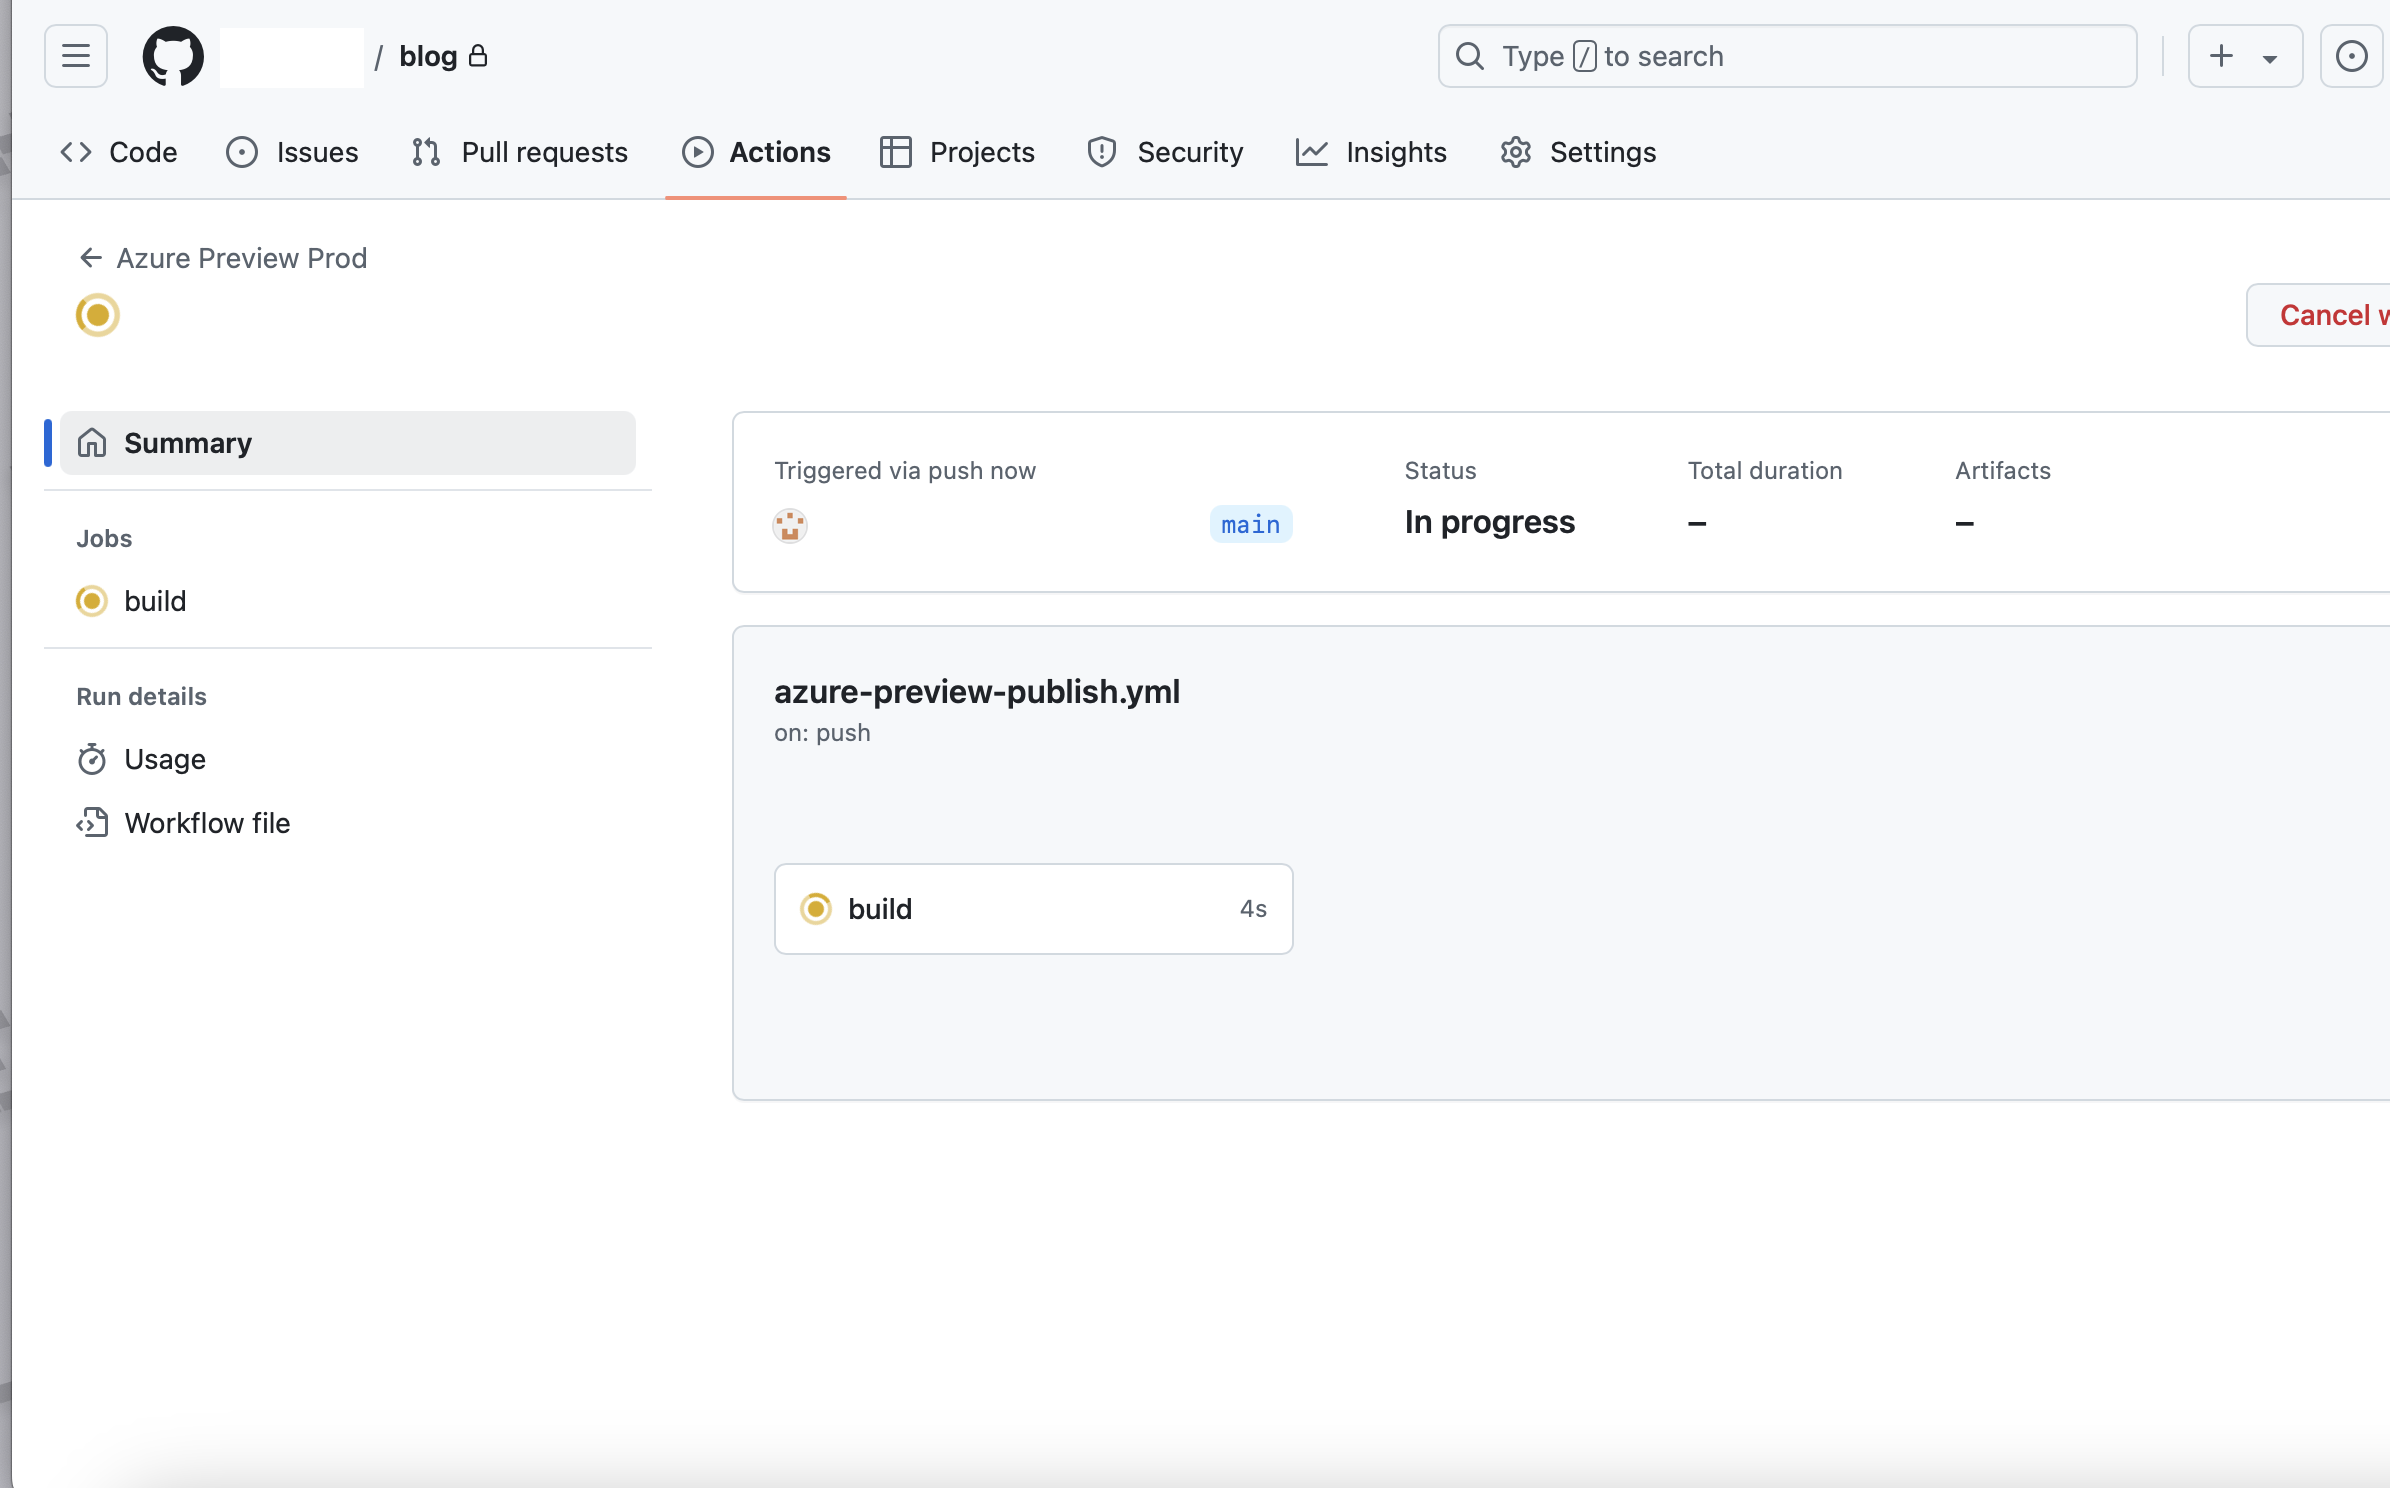
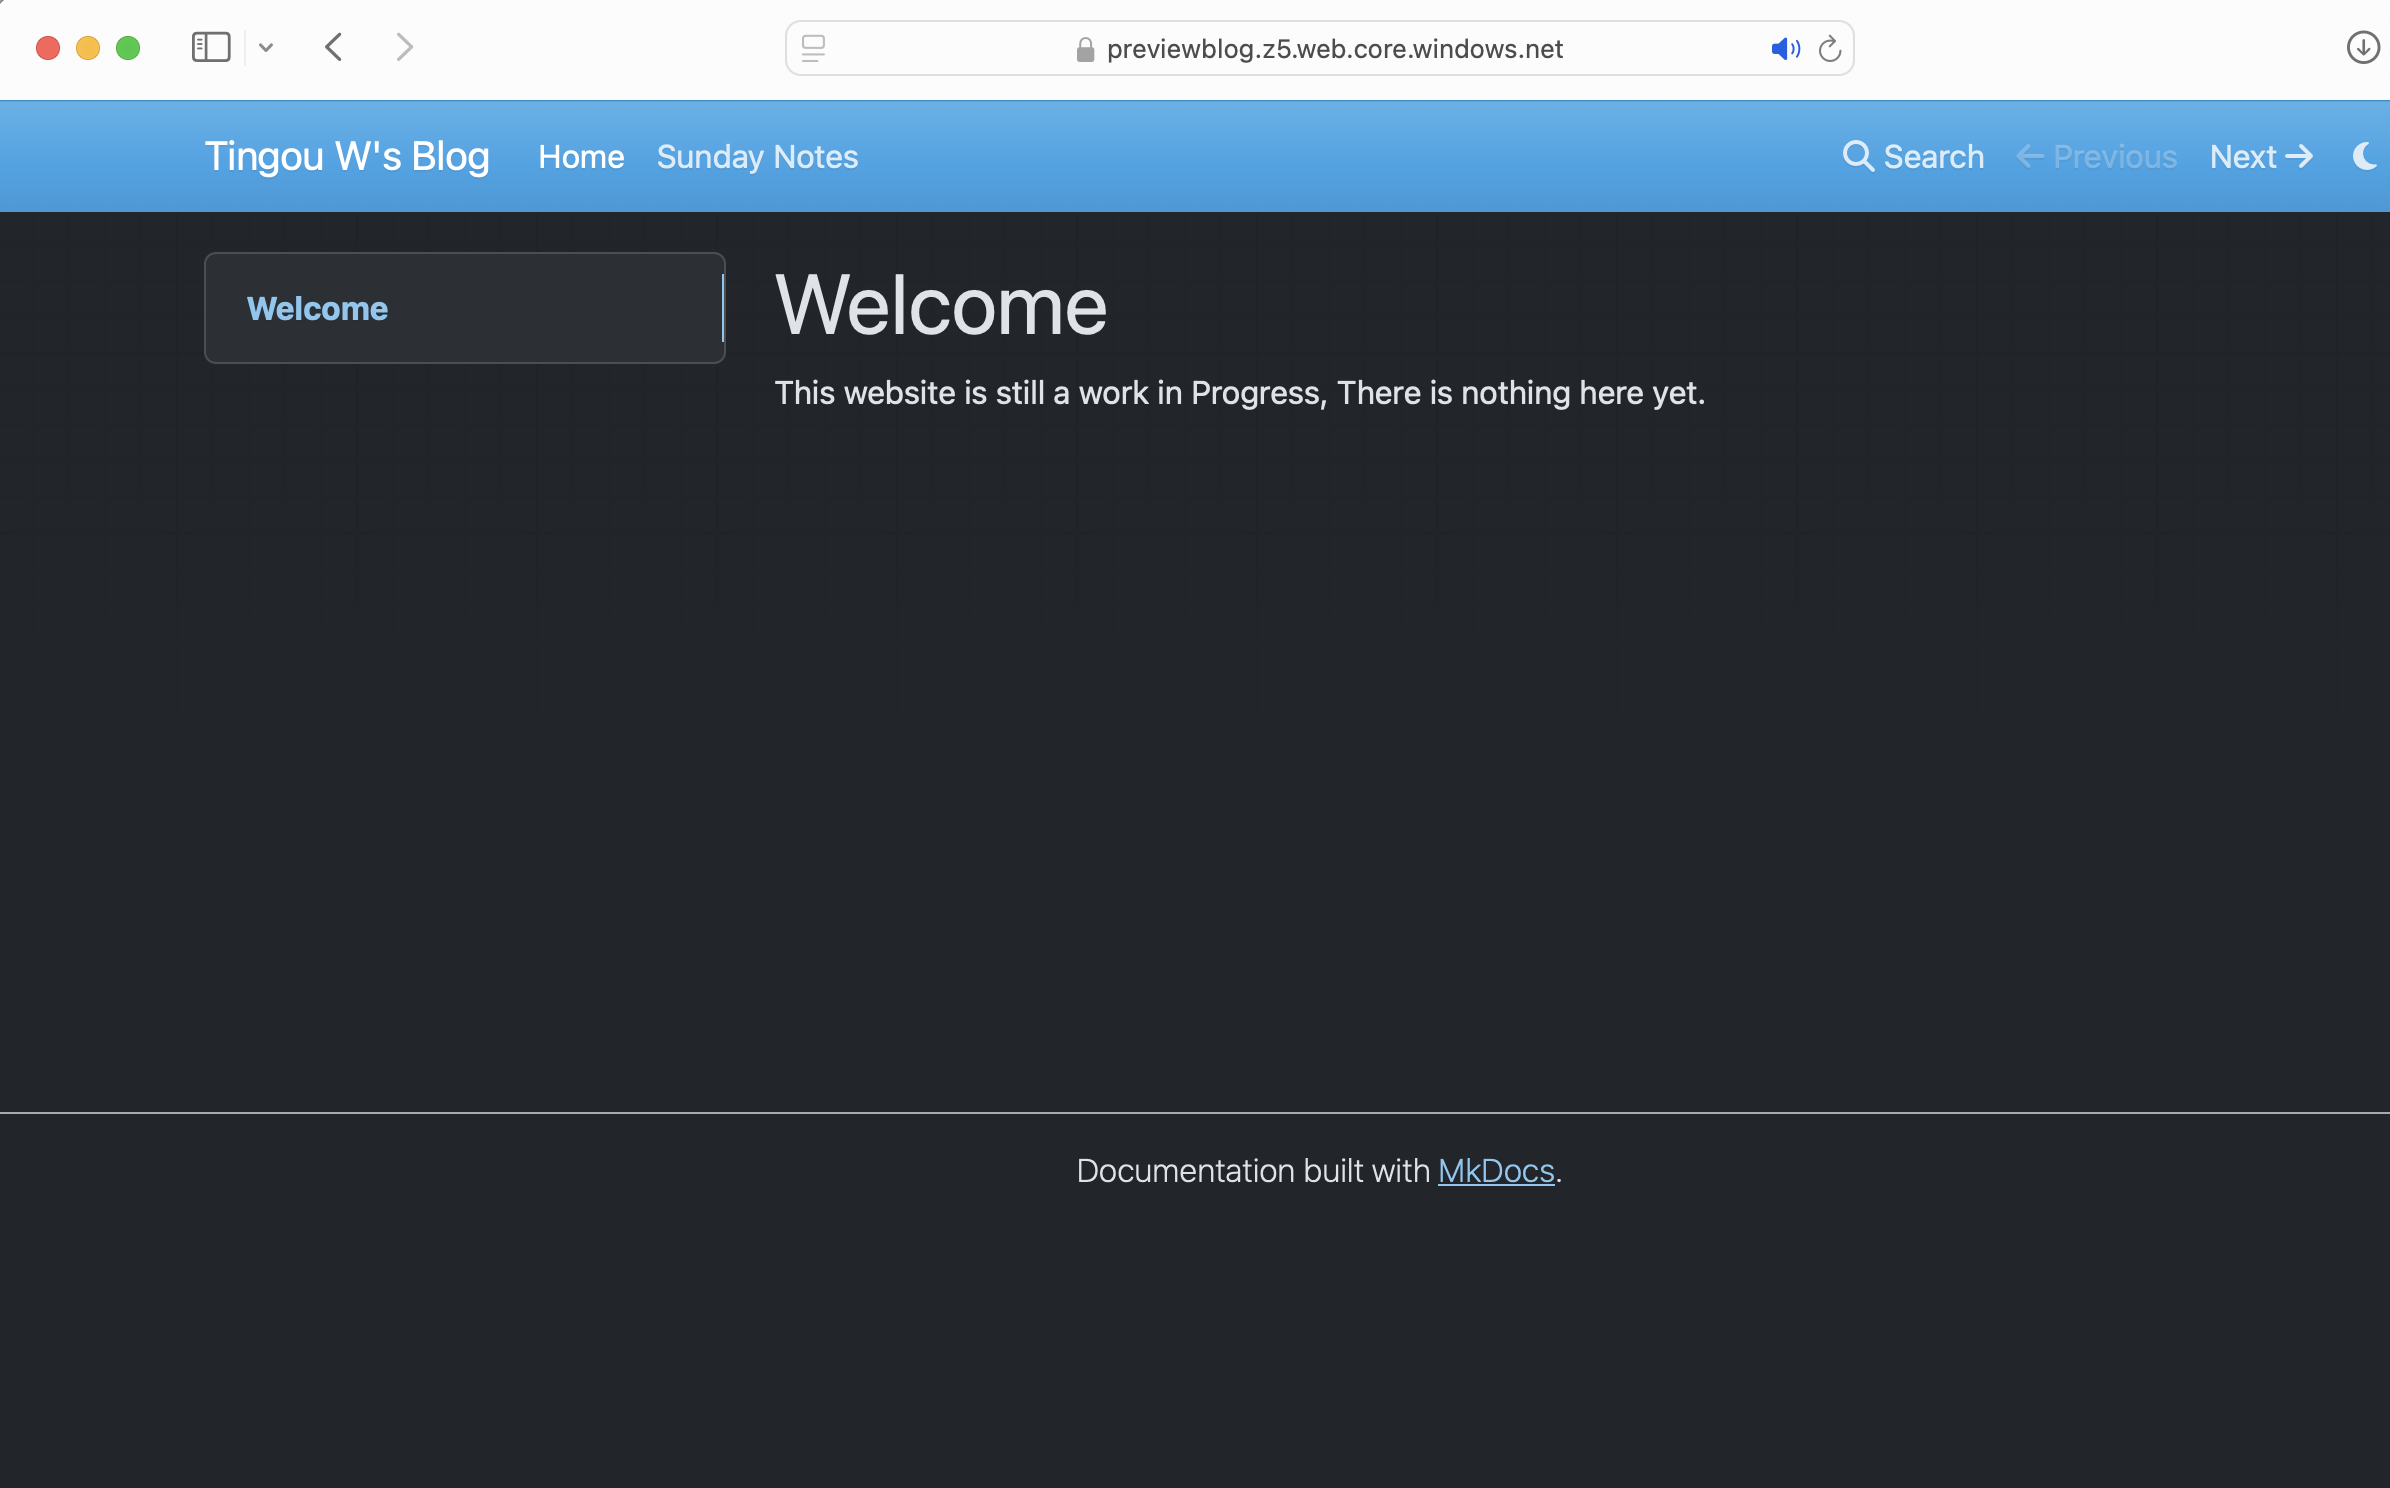
Wait around 1 mins. Open the Endpoint Url we got in Step 2, now we should be able to see the website we just deployed on Azure using GitHub Action! 🤩🥳